The Guide to B&W Film Development
- At September 9, 2011
- By Jack Chauvel
- In Blog, Film, Guides
 3
3
I have finally put together the 5 part Guide to B&W Film Development into one piece. As my initial intention was, I posted this as 5 different parts over 5 days. It was a lot of work and took me a long long time (approx 20 hours in total to put it together) and I would now like to consolidate it for everyone to read.
I have decided that I will continue writing guides for this blog, discussing film techniques and post processing techniques. I have added a new guides section to the website menu and what better way to celebrate than by adding the Guide to B&W Film (take a peek at my other post processing guides while you are at it!).
Part 1 – Introduction to B&W Film
Part 1 will deal with an overall view at the process.. the jargon.. the film.. and what you are looking to achieve. The main idea is that by the end of the 5 days there will be a guide with enough information for you to purchase, prepare, develop and then scan your own film. I wont look so much into the history of film (I can save that for another time) but almost think of this as a science experiment. Now I will say right off the bat.. this is for Black & White development only.. NOT c-41 process/colour negative or E-6 (slide)/colour reversal film development. I will write guides to those processes.. as I learn them myself.
I will start with the jargon that might be thrown around over the next 5 days of posts. Dont be scared to look it up (I have linked to definitions for easy viewing) and I certainly didnt remember what did what the first time through and to be fair you cant really write a guide without it. Ill try and follow the KISS (Keep It Simple Stupid) rule as much as I can but I figured I may as well get some of the jargon out of the way.
Latent Image (Undeveloped Image)
Developer (What develops the negative)
Stop (What stops the developer)
Fixer (What makes the image permanent on the negative)
Photoflo (A product that cleans the negative, assisting in drying and removal of streaks from the negative)
Rodinal (A type of developer, one used to create this guide)
Negative (The film that the latent image is originally stored on and then developed to become the usable film negative)
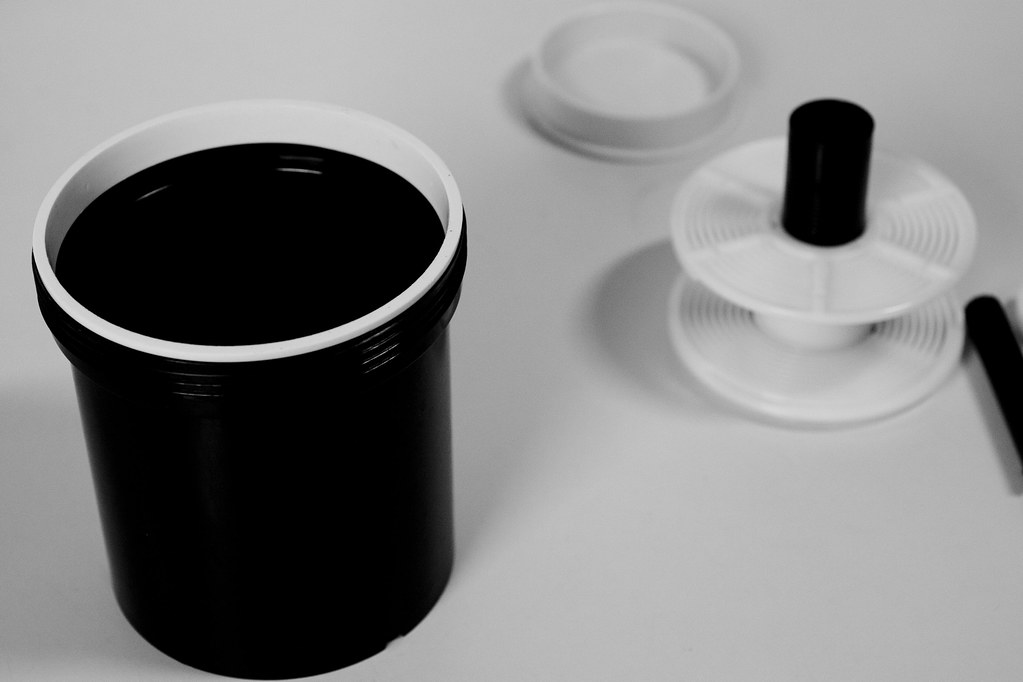
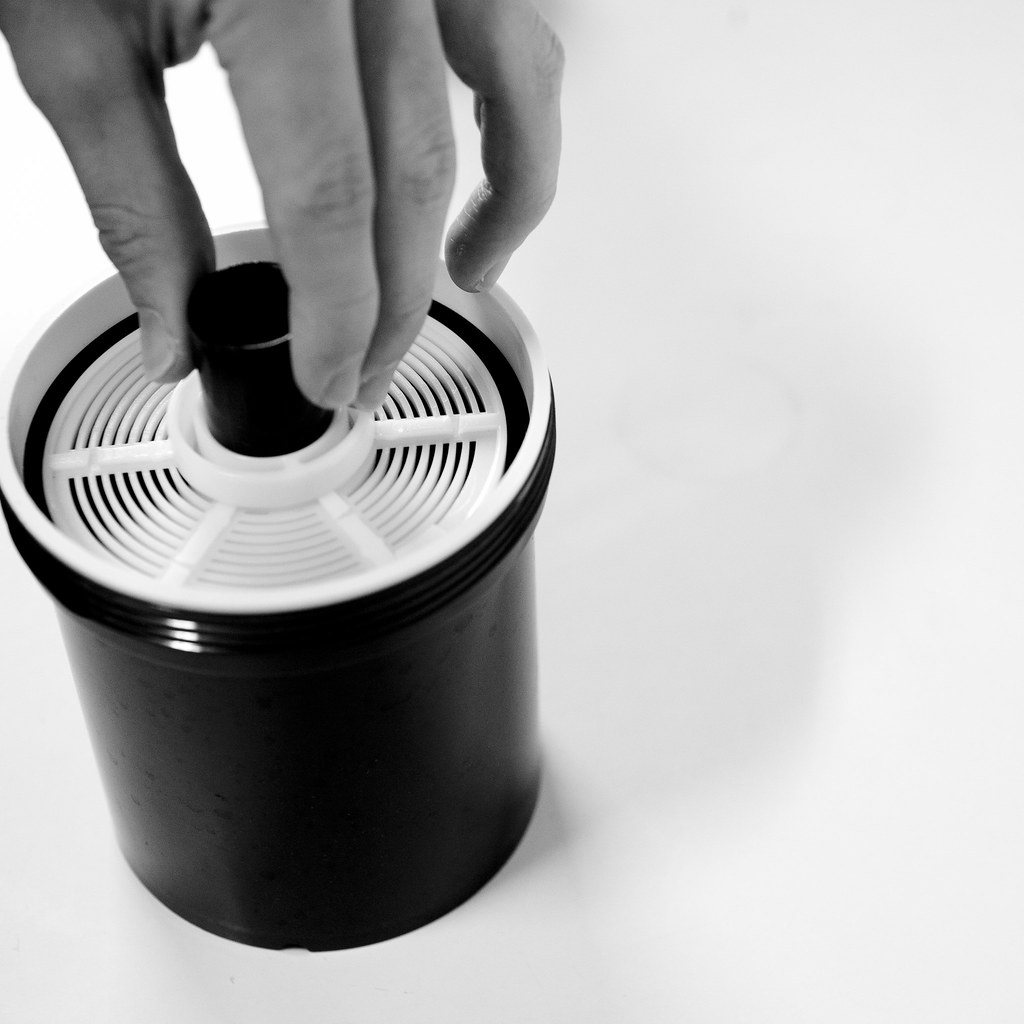
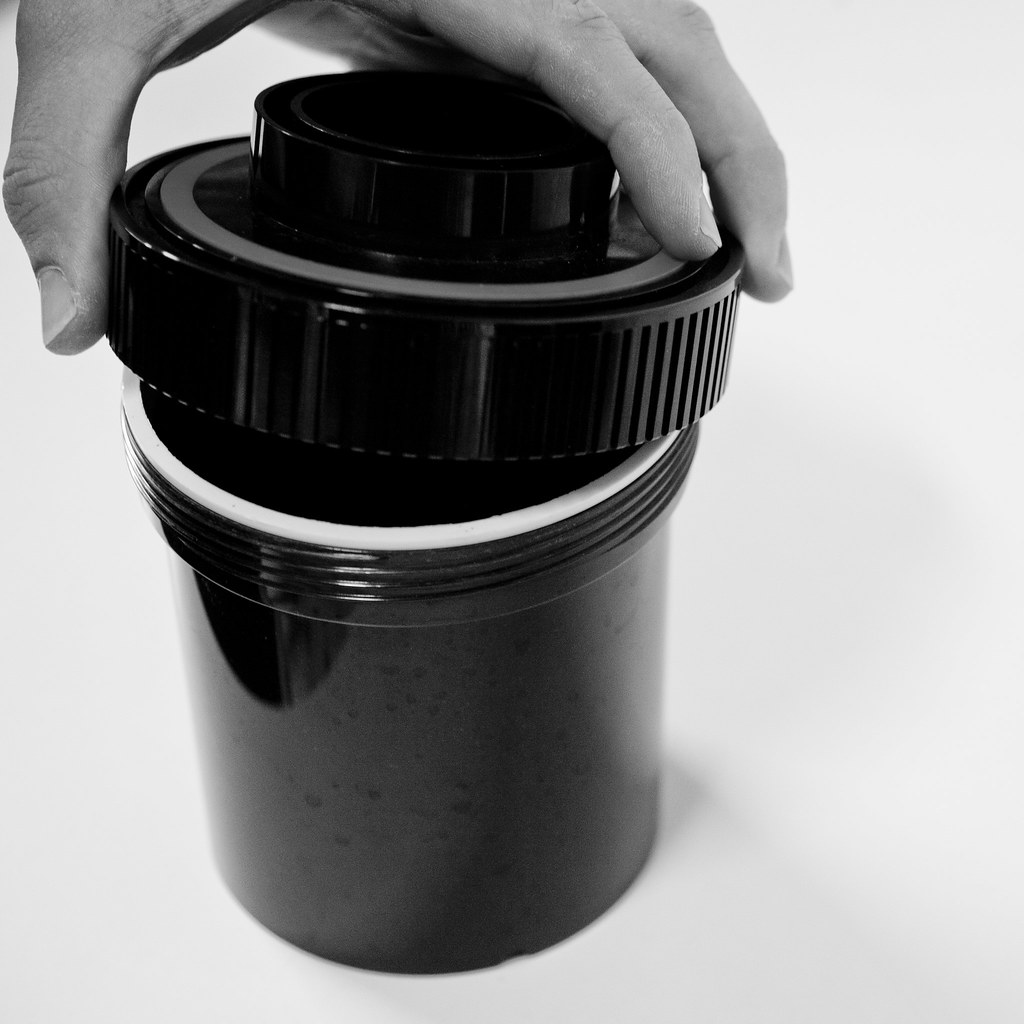
Tank (The container you develop the film in)
I will assume by this point that if you are interested in developing your own film, that you will most likely already have a film camera or the intent to buy and have some knowledge of what they do! Basically the film is a plastic sheet that is coated with an emulsion of light sensitive silver halide salts which when exposed to light create a latent image (as explained above). This emulsion can have many attributes too it and be made up of many layers which control the sensitivity (ISO/ASA), contrast and resolution of the film (colour/saturation too.. but more about that another time). Films come in a variety of sizes.. so many sizes but the most common available (and used by people new to film) are 135 (35mm), 120 and 220. This is where the camera and it’s dials come directly into play (and you of course), as this defines how the film is exposed to light (to create the image). The development process is simply the chemical reactions to convert the latent image into a permanent image. I am of course keeping this all very high level but for some more technical information have a read here.
Once you have shot your roll of film and wound it back the magic begins as you use a change bag to load the film on a reel and put it in the tank. You then go through the development process (dont worry, these will be covered during the week).
The what happens in the development process (In a Nutshell).
- The developer converts the latent image to metallic silver.
- The Stop halts the developer converting the image to metallic silver.
- The fixer dissolves silver halide salts on the negative, making it light resistant and permanent.
- Wash stage washes out any excess fixer and ‘cleans’ the negative. This can be improved by using a washing agent like Photoflo which can assist in removing drying marks when the negatives dry.
Sounds simple eh? Well it sounds simple but it gets a little more complicated.. mixing things so you are ready for the process.. preparing chemicals at the right temperatures based on the developer you are using, the film you are developing and the exposure time. All these wonderful things I will get too in due time. Now unlike traditional film development I dont actually create prints of my negatives.. nor have a dark room or the full setup to do this. Advantage? In some ways yes.. it is definitely cheaper. I take a new school approach of digitising my negatives (some may call it archiving) by scanning them in 12 at a time (two strips of 6). WHAT? No Darkroom?!?! Well yes.. isnt it fantastic? For those of you who thought you needed to tape your bathroom windows up with garbage bags, or find a cupboard that you can make light tight and then ghetto up a red light torch to do your developing in a small nook at cranny.. well never fear.. modern technology is here. There is a plethora of scanners now that can scan film negatives.. from your very basic flatbeds to much higher end dedicated film scanners.
So I know Part 1 is a little light on specifics in sections.. mainly so that I can explain certain aspects of the process in more detail when its place comes up in the guide. So why go to all the effort? Well.. its part of the fun.. part of the hobby.. you create the photo on digital by pressing the button.. but with film you create the photo by exposing the shot and then developing it.. it adds a whole new dimension of fun.

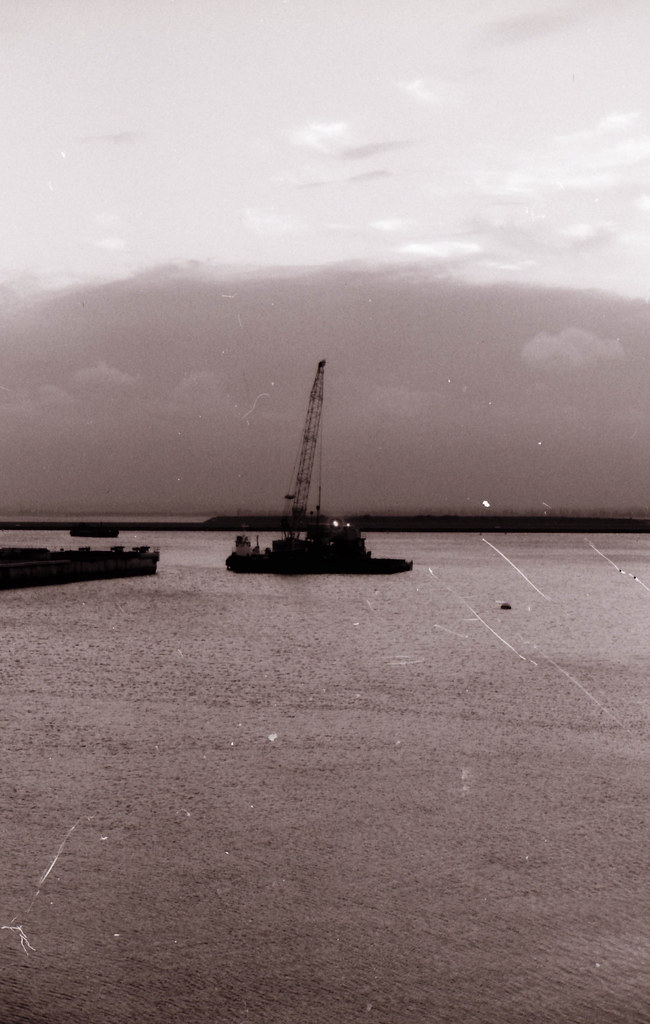
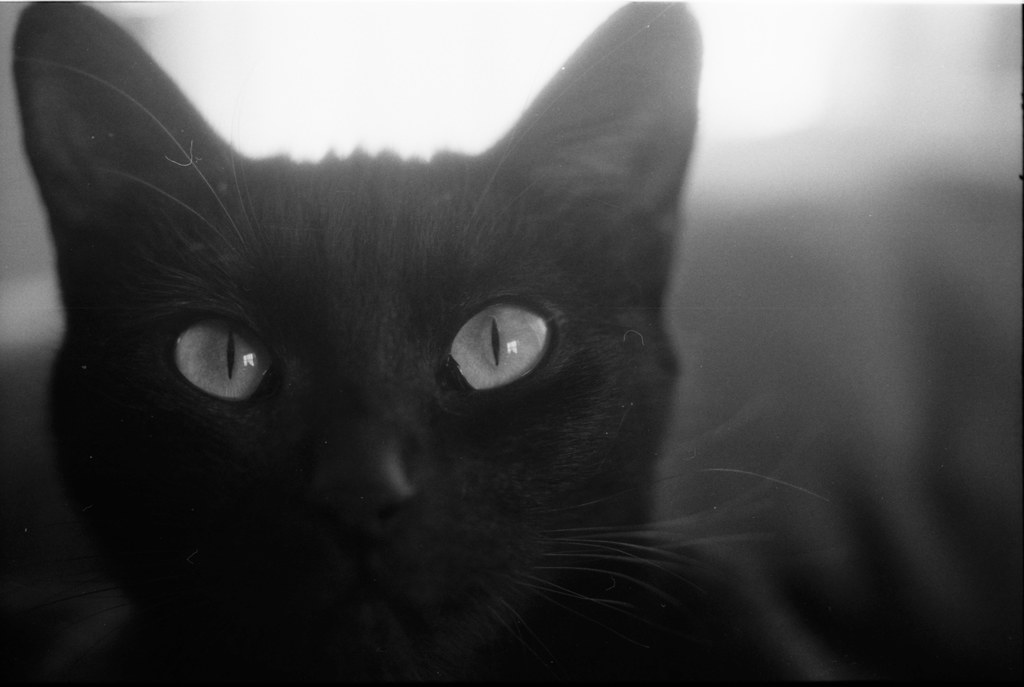
This is one of my favourite self shot and processed shots thus far. The way the range of the film is nice as well as the DOF and the way the light is captured. It is hard to beat. Note: Quite a few shots in this guide might look sepia like as above, this was due to my originally scanner only having a colour setting (scanning B&W as colour..) I have now acquired my new scanner but yet to re archive my old shots 🙂
Part 2 – Preparing for Development
Part 2 will look at how to prepare for development. This is infact the biggest part of the process and the one that generally takes the longest. What? No? Surely the development process is the longest part?! Actually once you are setup the Development process takes the least amount of time.. it all comes down to proper preparation. The 5 x P’s comes to mind when thinking about this … (Proper Preparation Prevents Pisspoor Performance).
So where do I start? Well I will break this up into two main sections.. The Chemicals and The Equipement (Essential & Optional). The Chemicals and The Essential Equipment are things that you must buy/source useable items to successfully develop your own film.
The Chemicals
This was discussed in part 1 but at this point in time it is best to pre-prepare all of the chemicals you need for your development.
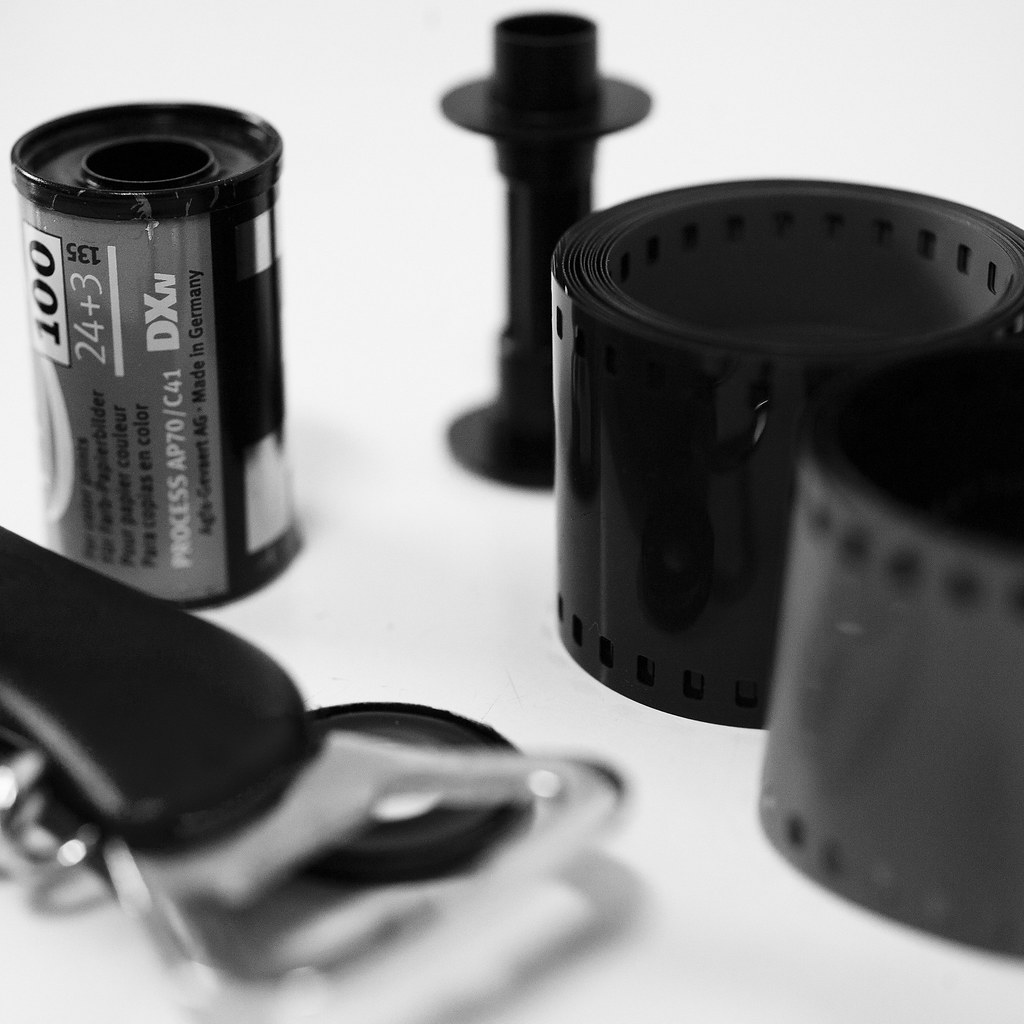
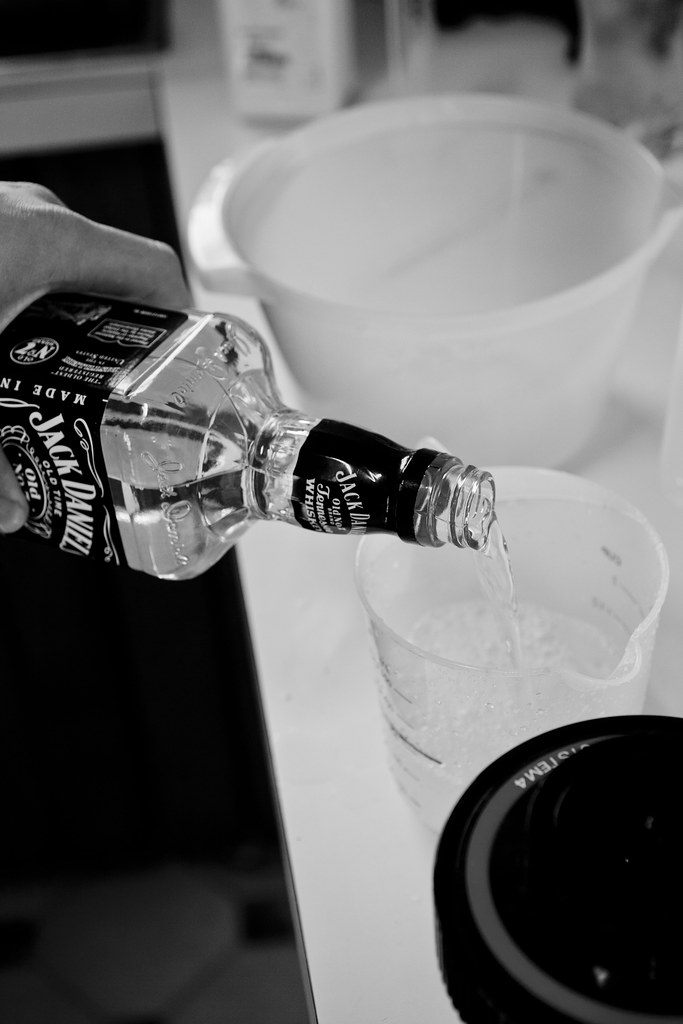
- Developer – There are many choices here but to start with lets look at what is generally easily available. Two that spring to mind straight away is Ilford ID-11 which is the first developer I ever used and Kodak XTOL. Both of these developers are available at Australian based stores such as Vanbar. Unfortunately the amount if ID-11 I had available to mix was 5L and I didnt have the right equipment (yeah yeah.. harp on about preparation and dont do so myself!), so for the purpose of this Guide I used a highly concentrated developed called Rodinal (R09 One Shot) which is a single use developer which you mix right before usage and discard at the end of the process.
However please keep note that other Developers (such as ID-11 and XTOL) come in powder form and require you to throughly mix the powders in water to create the developer (I will include this info later in this post). - Stop – Stop is what stops the developer and is an integral part of the process. This has a decent shelf life so purchasing a concentrated amount which you then dilute further allows you to have enough prepared for multiple rolls in advance. I use Ilford ILFOSTOP and as above.. can be sourced from stores such as Vanbar. This chemical is of single use so at the end of each development cycle you simply throw it away.
- Fixer – This fixes the final negative.. and like with the others comes in a concentrated liquid. I use Ilford Rapix Fixer and like with some developer this can be reused (but becomes more dilluted) so I generally reuse fixer 3 – 4 times before discarding and mixing a new amount. You can test to see it’s effectiveness but I dont find it expensive enough to warrant doing this yet (due to the volume I develop) but for beginners I dont think this is something to worry about.
- Negative Cleaner – I have referred to this as Photoflo as this is the type of negative cleaner I have and use and it is created by Kodak. This comes as a super concentrate but ill include the basic details of how to mix these later in this post.
The Equipment
This will entail all useful equipment you can use to complete the process.. the vital photography related equipment but also the optional choices you can make (in terms of budget) of measuring devices, mixing bowls, stirrers, bottles, pegs, funnels, trays and more. This is really just a guide so take it as you will. You can even just mix up what you are going to use each roll and discard, it really is up to you.
Essential
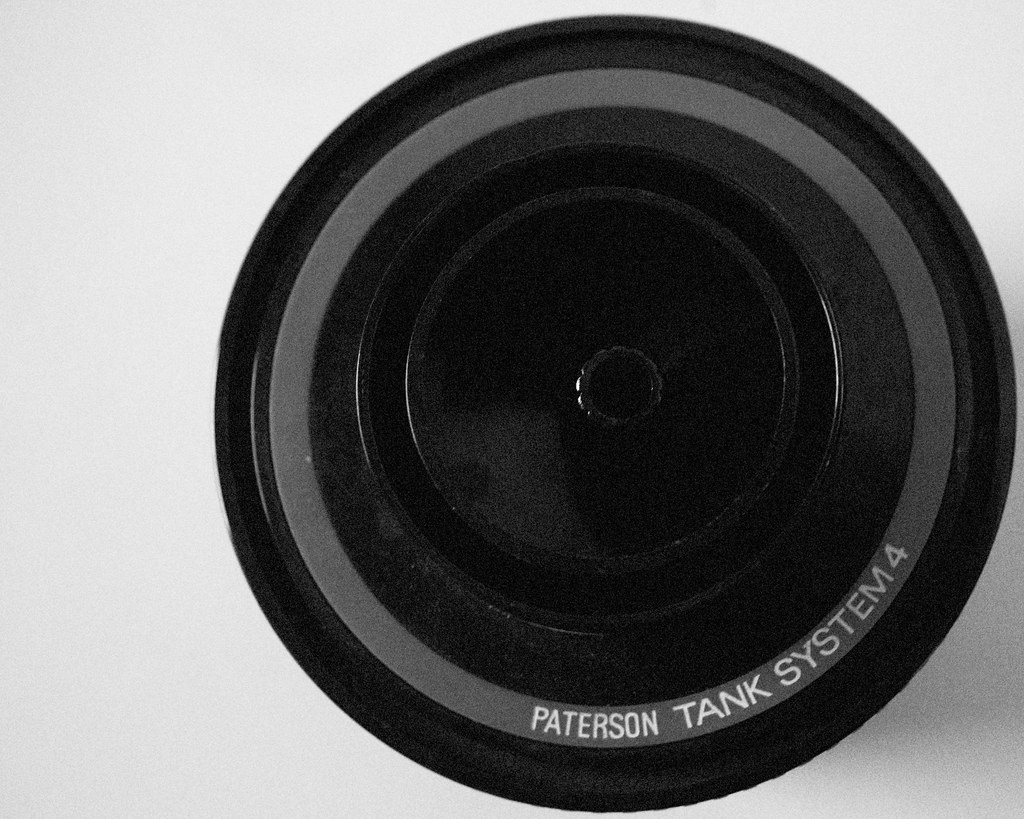
- Developing Tank – This is where you develop your film.. it comes with reels and everything you need to load your film and develop your film. I have 5 of these now with multiple reels for 35mm and 120 film.
- Changing Bag – This is where you take the film out of the cannister, load it onto the reels and load up the tank.. all in a light tight environment.
- Thermometer – For measuring temps when mixing the chemicals and for the development process.
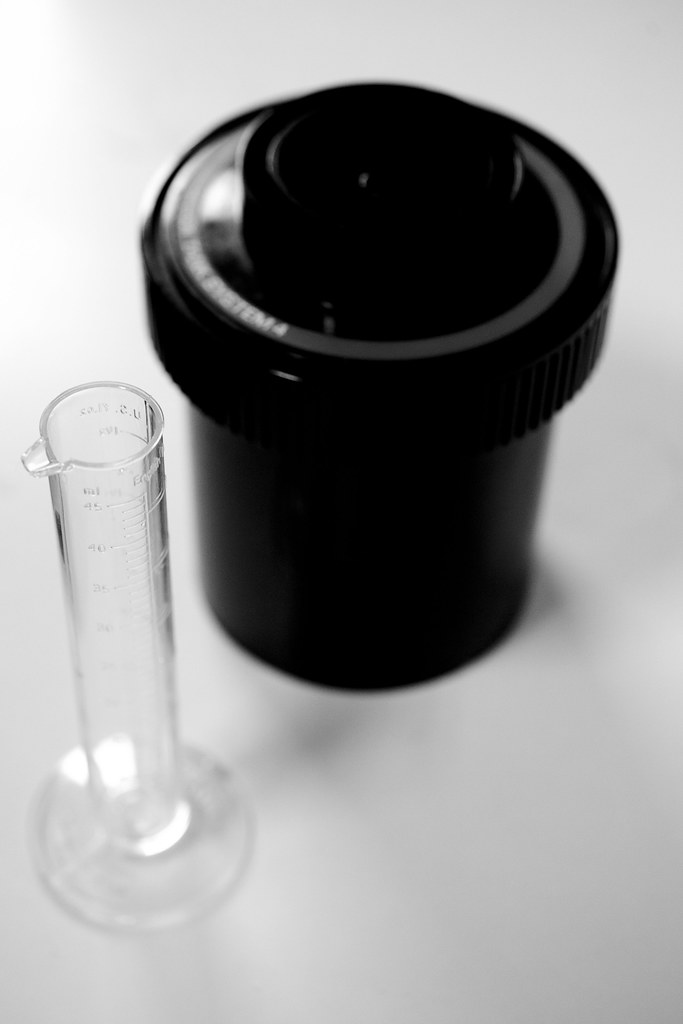
- Measuring Flask – Great for measuring small amounts of chemicals and is very handy especially for things like Photoflo which is a 100+1 dilution.
- Measuring Jug – Great for larger amounts.
- Pegs – Useful when pegging up your negatives once you have developed them.
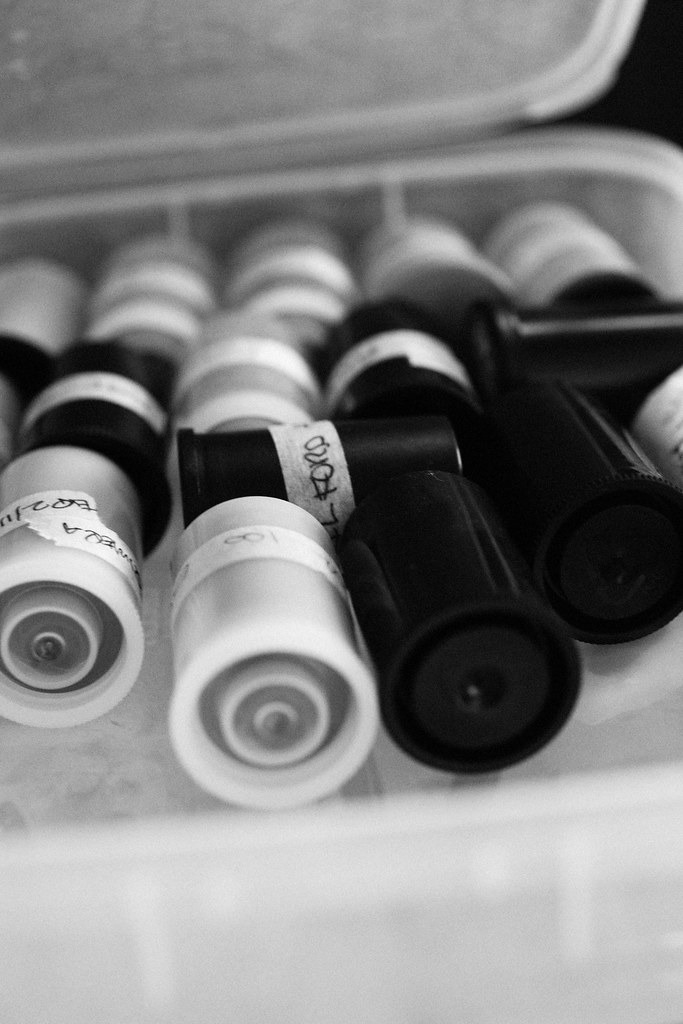
- Airtight/Lighttight Bottle(s) – Bottles such as these are great for storing the chemicals you mix for future use, or storing the chemicals you have used to reuse later. Using proper bottles for the chems is a great way to ensure they will work when you use them at a later date.
- Stirring Rod – I use old chop sticks.. to mix chemicals together or to stir mixes.
- Bottle Opener – For opening your film cannister in the change bag.
- Scissors – For opening packets and cutting film.
Optional
- Funnel – If using bottles or bowls without spouts this is very useful to reduce splashes
- Beaker – Useful for heating/cooling chemicals
- Ice Cube Tray – Ice cubes are very good in being able to reduce your developer temperature at the development stage
- Bowls – Large/Small are great for distributing different chemicals. I like to use small plastic bowls where I have measured out the exact levels I need of what chemical for easy use.
- Plastic Storage Box(s) – Something you can keep everything in and tucked away in the garage in. This is important as you might only use the concentrate mixes every couple of months.
- Stop watch – I just use the timer on my phone for this, but a stop watch would also be very handy.
- Bottles – I keep a plethora of plastic bottles around for small mixes
Now I think that is everything covered.. not a bad list! If you are looking for a place to pickup some science type glassware for mixing, measuring and pouring then you can checkout www.wiltronics.com.au as they have a great range of products. So once you have all the equipment needed you need to prepare your chemicals. As I mentioned under each one all chemicals either come in a powder form which requires mixing, or they come in a concentrated form which requires dilution with water. Each product is different so ill ask you to refer to the instructions provided with each. For demonstration purposes however ill put down the instructions for Ilford ID-11 Developer, Ilford ILFOSTOP and Ilford Rapid Fixer.

Ilford ID-11 Developer
I am grabbing these instructions straight off the original box. It doesnt take long, requires a little bit of elbow grease just make sure you have enough storage to put the mixed developer into! This is for the powder pack which mixes to form 1L of developer and making a 1+0 dilution mix.
- Heat 750ml of water to 40°c
- Add the contents of Sachet A and Stir until mixed
- Add the contents of Sachet B and stir until mixed
- Add 250ml of water (to bring the total to 1L) and stir thoroughly.
Easy eh?
This developer is also able to be used multiple times.. which is very handy (but also requires extra storage). This might seem strange, as in.. why would you need so much if you can just reuse? Well it sort of works like cordial. If you mix a cordial with water and make a drink and then drink half and top it up.. the cordial further dillutes and the flavour becomes weaker. Developer works in a similar way in that after developing a roll of film it becomes less potent. How less? Well if you mix it right in the first place it should be measurable in terms of time. So for example on the second use of the developer you increase by X amount of time (the time the developer is in the tank) so that it is able to develop the film as required. Ilford recommends the following based on developing 35mm film 36 exposure rolls (X + % where X = Use Number).
- 2 + 10% added time
- 3 + 20% added time
- 4 + 30% added time
- 5 + 40% added time
- ..
- 10 + 90% added time
The time value is dependent on the type of film you are using and how it matches up with the developer. I will explain more about how to calculate the developing time based on the film used later in the guide.
I would recommend for beginners that you dont do this however, and you simply use a fresh batch each time you develop. However if you wish you can store the old developer in a bottle like one below (I have actually linked this above too).
- Bring 1900ml of water to 20°c (place bowl into fridge or floating in another bowl of icy water)
- Add 100ml of ILFOSTOP and mix well.
- Bottle (as in photo above) for use.
- Use 310ml per roll as required and discard once finished.
Getting easier 🙂
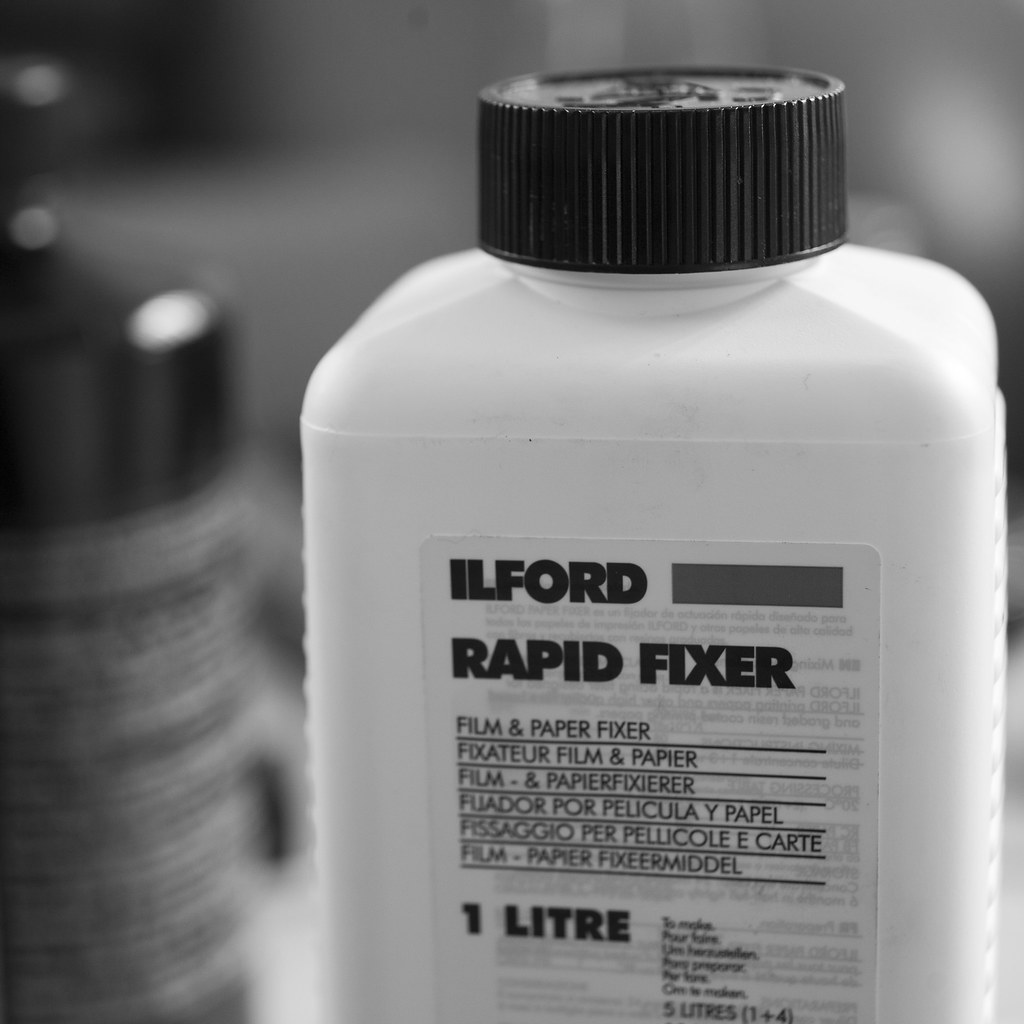
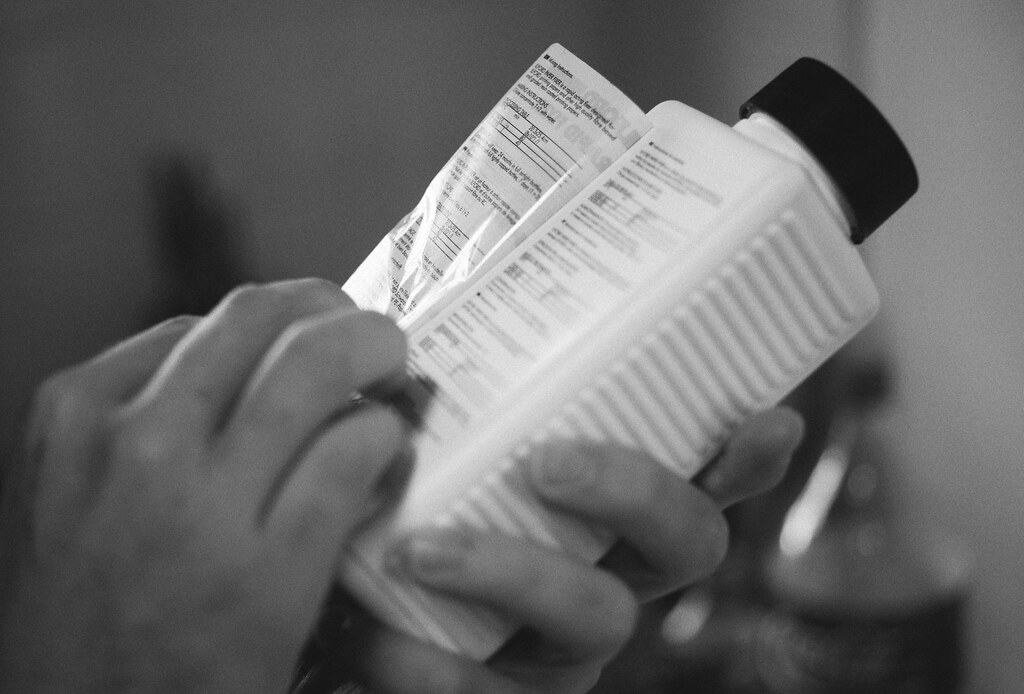
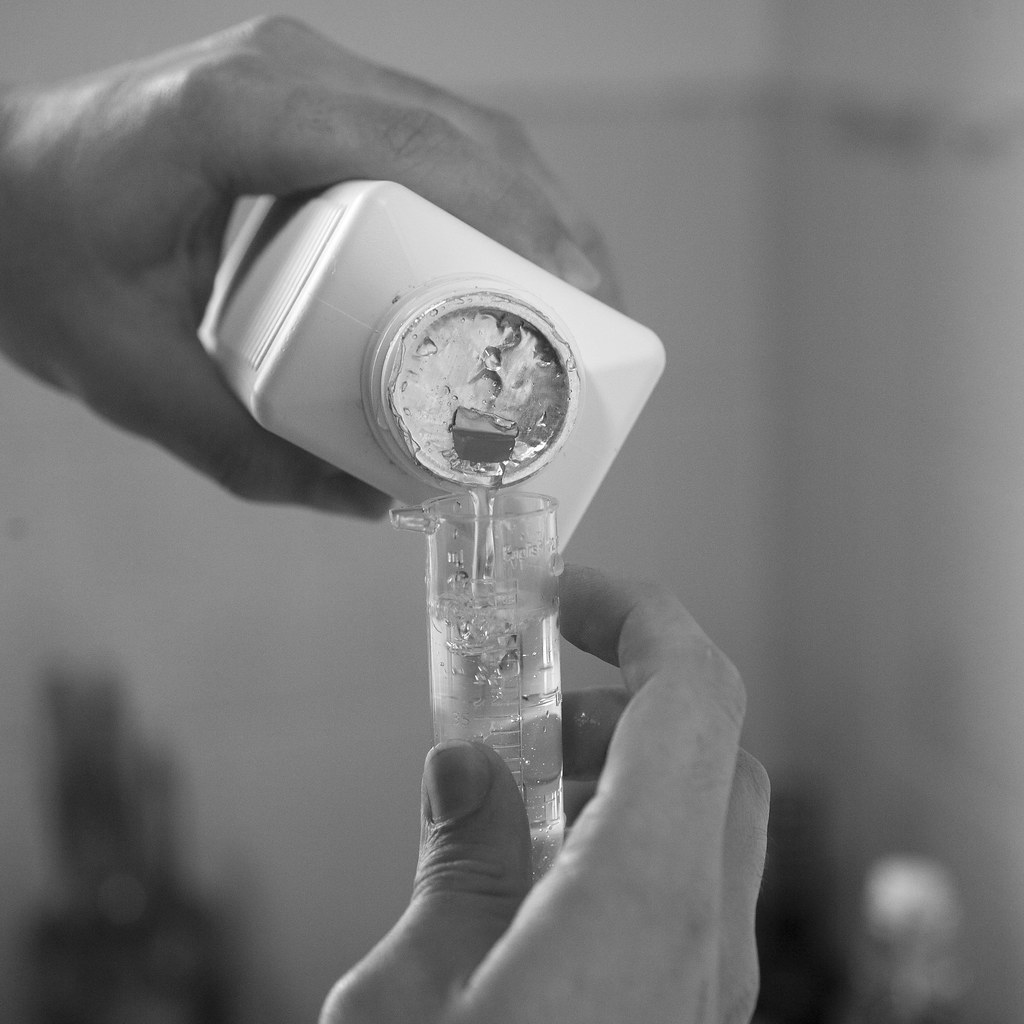
Ilford Rapid Fixer
You can actually see it in the very first photo in this post but the label peels away revealing the mixing instructions. Much like the ILFOSTOP the Rapid Fixer is much easier to mix than the Developer. The dilution for the Rapid Fixer is not as weak as the ILFO Stop.
Dilution is 1 + 4 parts water.. meaning from the 500ml/1L bottle you will get a total of 2.5L/5L of Fixer (on the bottle there is two dilution values.. one is 1 + 4 and the other is 1 + 9, from my reading the 1 + 9 is for photographic paper so please dont dilute to that value!)
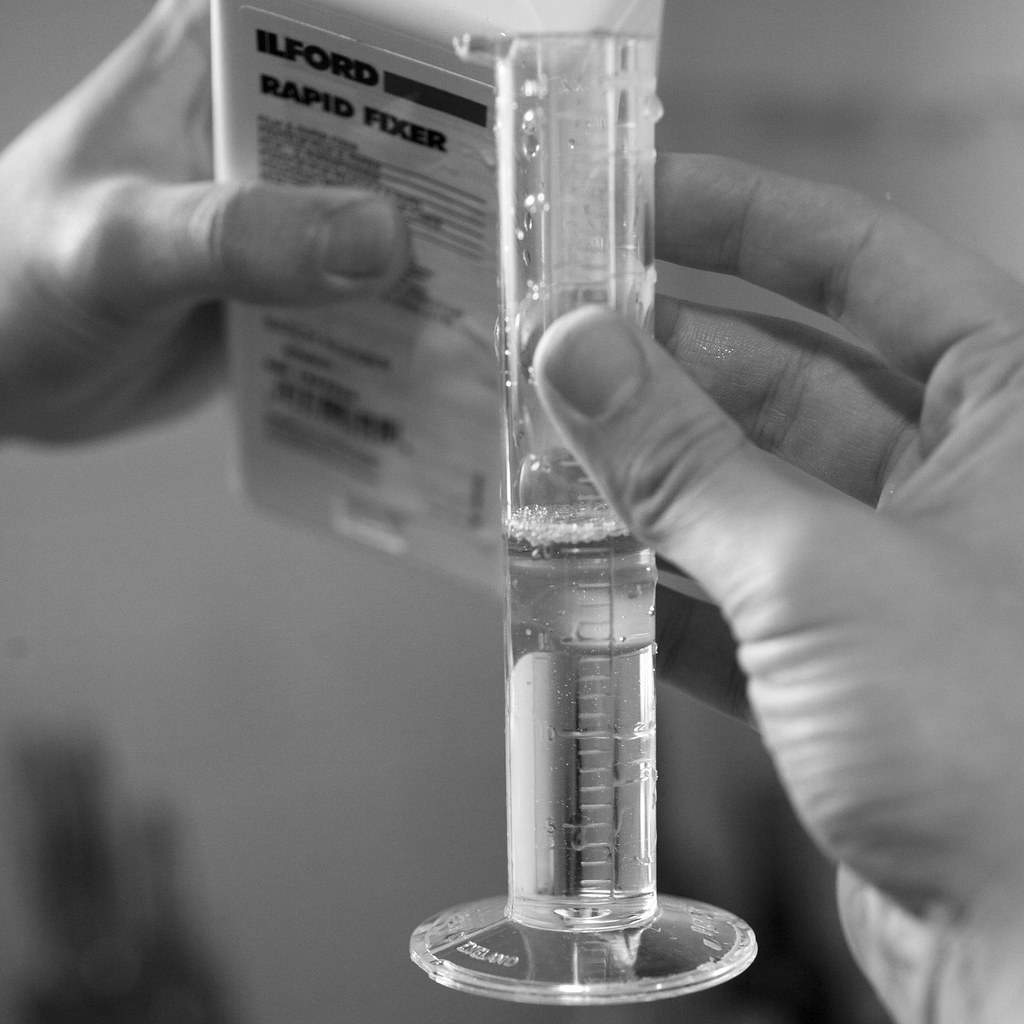
Below is for mixing 300ml of fixer which is about the amount we would want for one roll of 35mm film.
- Bring 240ml of water to 20°c (place bowl into fridge or floating in another bowl of icy water)
- Add 60ml of Ilford Rapid Fixer and mix well.
- Place to the side ready for you to develop with OR place in a clearly marked label ready for your next developing session.
- Use the 300ml (or mix more, 330ml with 66ml of fixer if wanting extra) during the development process.
- If reusing the same mix of fixer.. allow for extra time in tank.. I generally double the time to be sure (testing fixer ill discuss another time).
- Bring 297 ml of water to 20°c (place bowl into fridge or floating in another bowl of icy water)
- Add 3ml (yes just 3 ml)
- Mix well and use within a few hours of mixing.
- DO NOT MIX MORE AND STORE! I learnt the hard way by developing a roll which then didn’t develop!
Kodak Photoflo
This like R09 dilutes a long way at the same mix of 1 + 100. It more like a soapy bath so there is no need to bring the water to a certain temperature before mixing. I simply work out the bottle size and divide by 100 and add 99 parts water and 1 part Photflo. It mixes so well and is so cheap there is no point in keeping or reusing this so just discard after use.
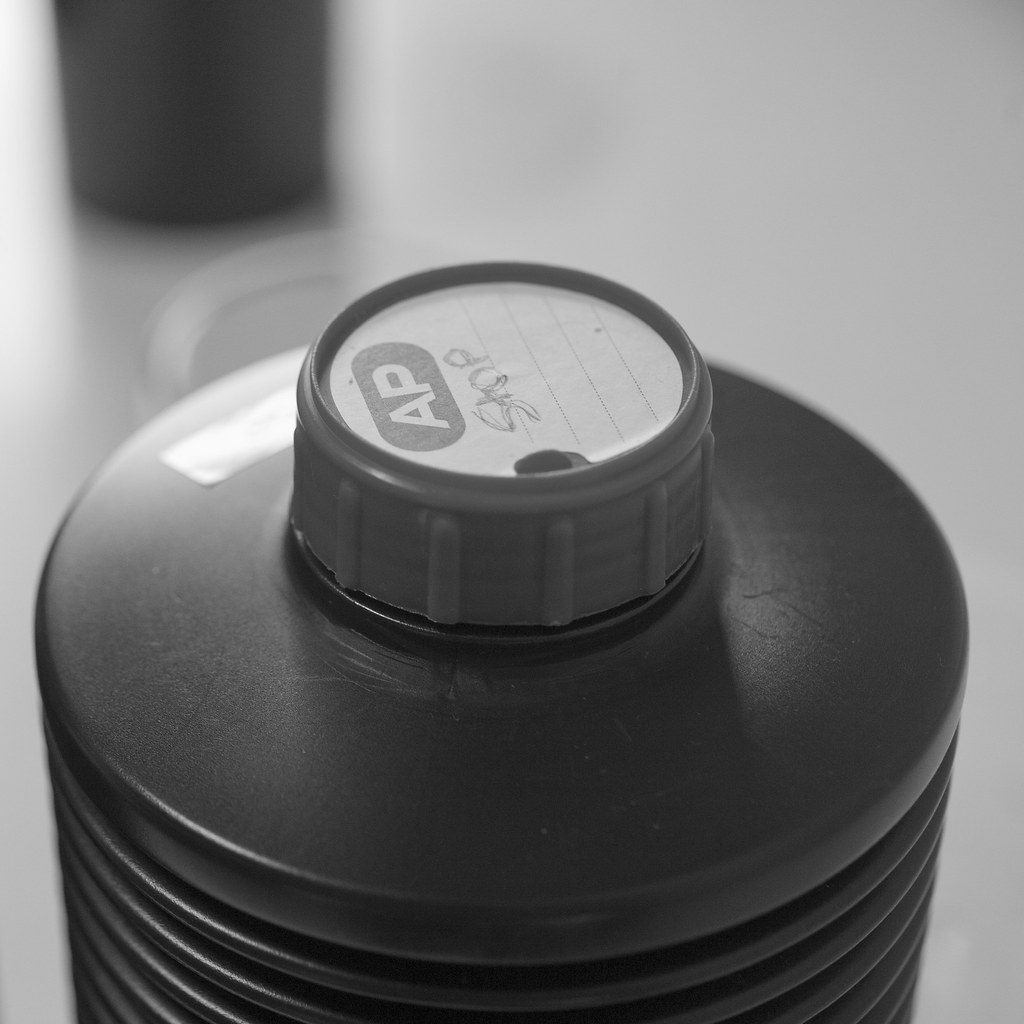
Here is one I prepared earlier (I figured using a bottle that is easy to identify as not being anything else bar Photoflo was the way to go!).

Well.. now that you have absorbed that massive amount of information I think it is time for me (and you) to rest until tomorrow. That pretty much covers the BASICS of getting everything prepared to develop. My number 1 tip would be to find some containers and mark on them the levels where you need chemicals for completing 1 roll or 2 rolls at once (the big tanks are able to develop 2 rolls at once). This way you can have premixed amounts or simply add the chemical you need and dilute with water up to that level. The biggest time consuming effort is the ongoing preparation. Once you have all the chemicals ready at your disposal you can develop a roll whenever you feel like it, in under 30 mins.
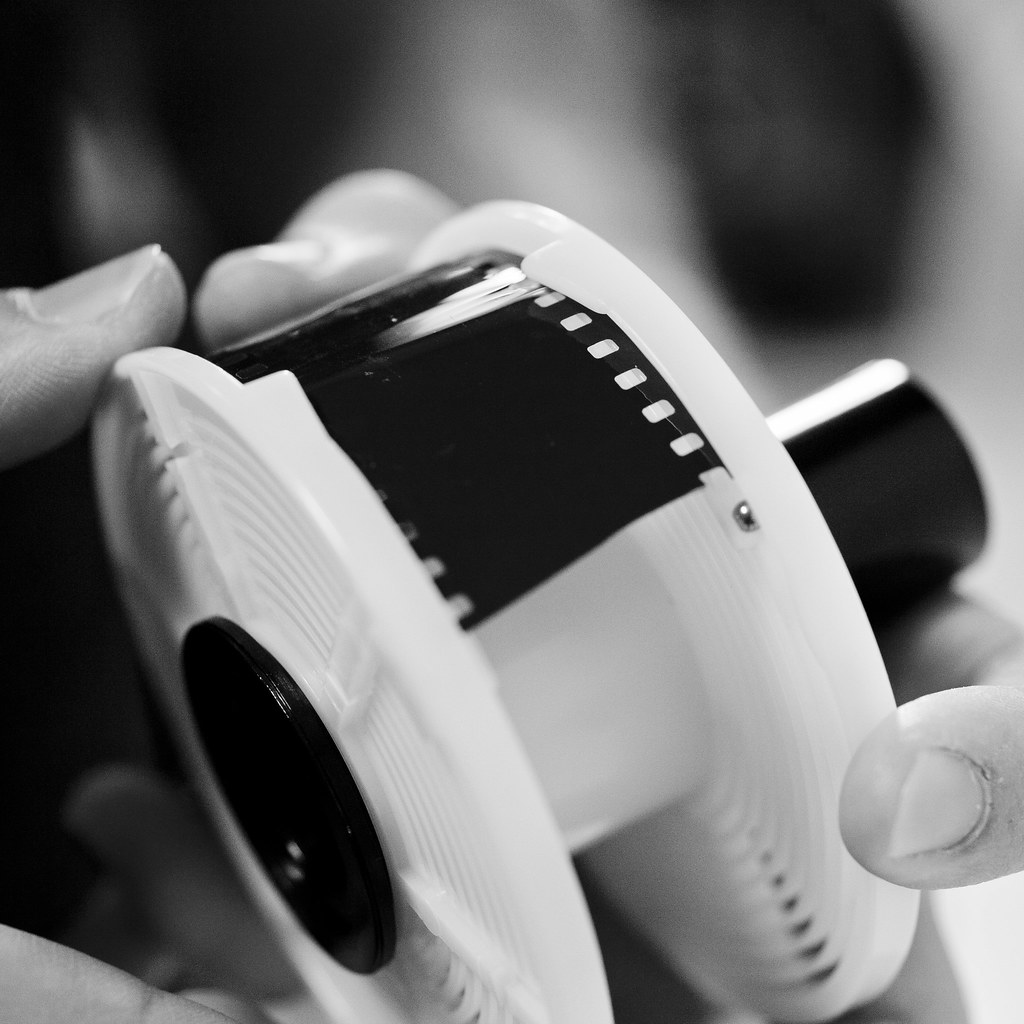
Part 3 – Preparing the Film
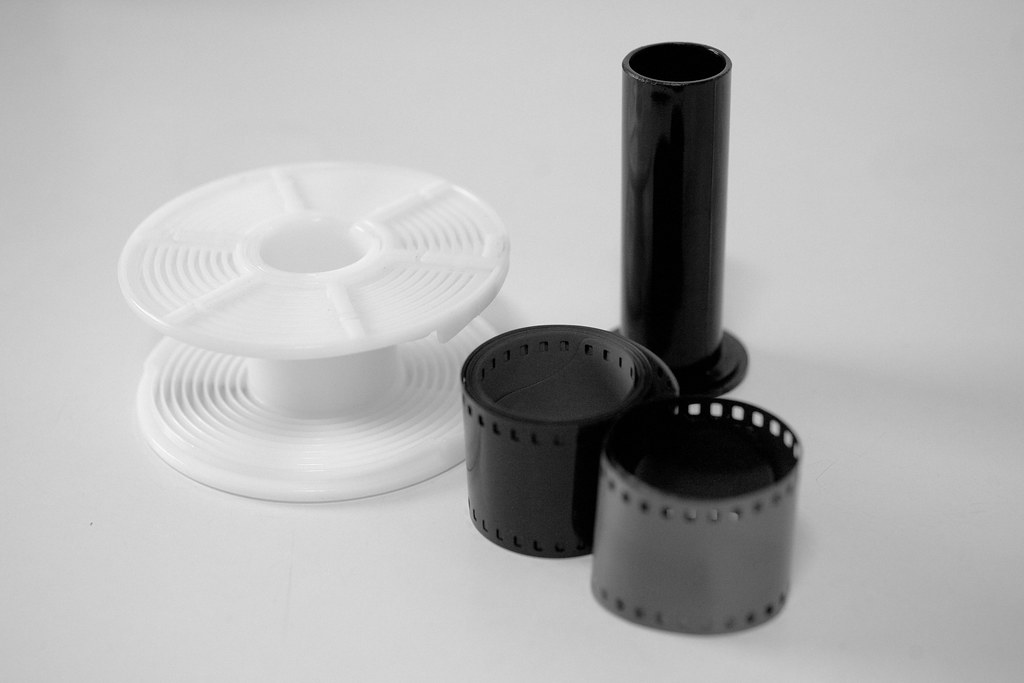
So film just goes in the developing tank right? Well.. sort of 🙂 It gets loaded onto a reel (pictured above) and this allows the whole roll to be exposed to all the chemicals during the development process within the tank. The idea behind the film reel is that once the film is loaded it is wound around the entire reel with an even gap between each row. Once in the tank the stirring stick comes through the top and connects with the black tube allowing you to spin/swirl the reel within the tank in a process called agitation.
Sounds easy? Well essentially it is.. when you can see what you are doing. Using film however that is light sensitive means that you either need to do this in a darkroom or within a change bag. Since we are doing this on a budget and with space limitations in mind I purely just use a change bag, which means you have to do it blindly by feel/touch. I have yet to master the skills of ‘walking’ my film on the reel, however I have improved greatly from when I first started. The effects of kinking, scratching and manhandling your film can be seen in the image below.
I will talk about the loading of the reel in the development tank, using the change bag and how it all comes together in Part 4. For the remainder of Part 3 I will look at opening the cannister, what the reel is and how it works and how to ‘walk’ the film onto the reel. You will have to bare with me my ‘practice’ roll is in fact colour and my donor roll of film for these photos was in fact an old colour roll that I found and didnt mind donating to the cause.
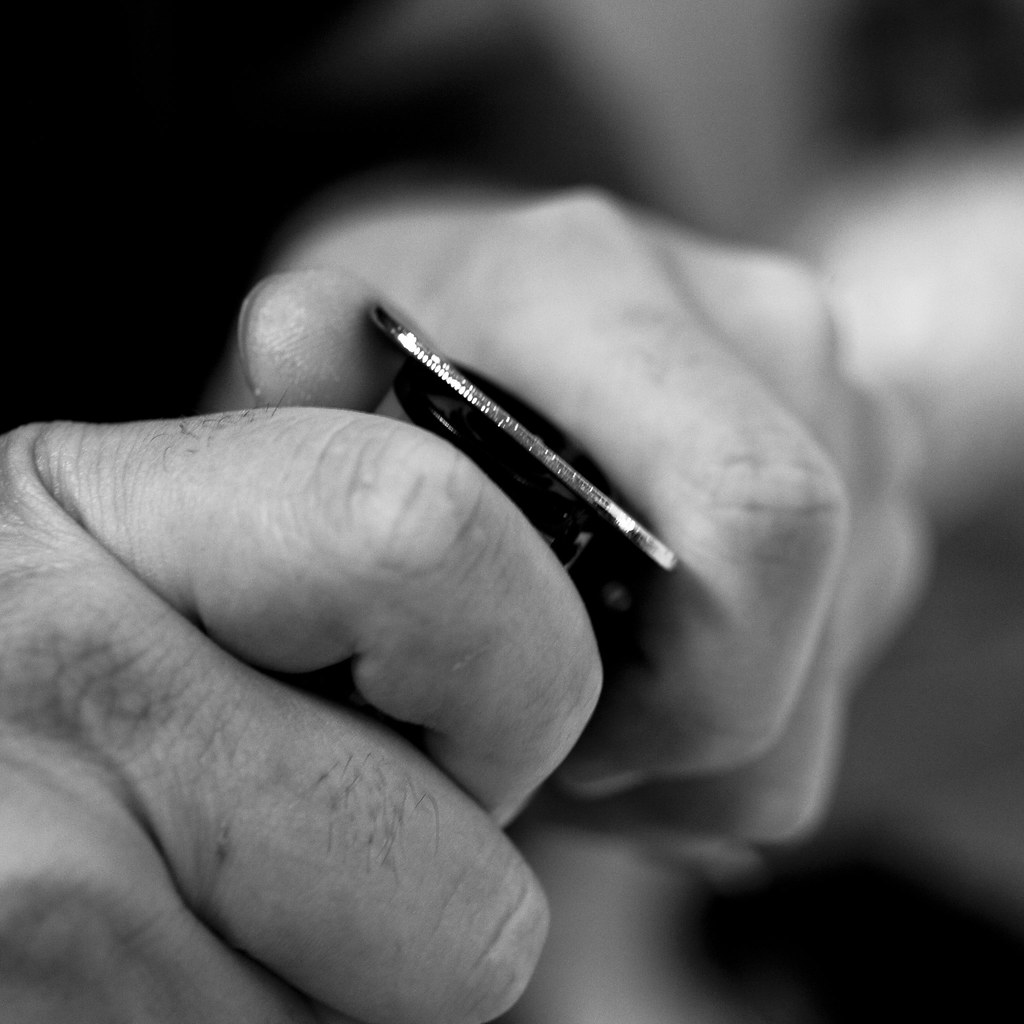
I picked up this trick from my good friend Daniel Lee when I was first getting into the ‘how to’ part of home development. Some people use a can opener but others like myself use a bottle opener. I have had mixed success but have found a normal keyring bottle opener to be the most successful method for me without causing too much damage to the cannister. I find the flat end (bottom) of the cannister the easiest part to open. Simply by working my way around the circumference of the cannister bottom you slowly work it away until you pop one side up. Once you have popped the end open (obviously you are doing this by feel in the dark bag), I carefully remove the lid and then slide the whole roll of film out with the plastic inner reel by pushing carefully from the top side of the cannister. I take note to have the cannister facing down when I do this so the film starts to unravel downwards.

The Film Reel and You
Step 1 – Load the center tube and fasten the clip
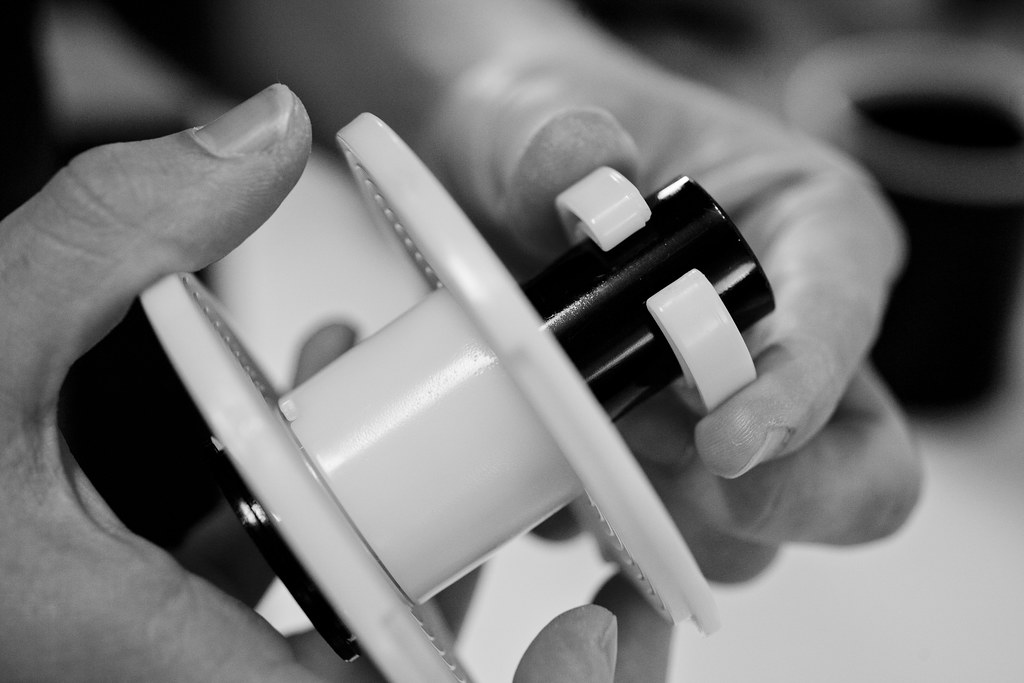
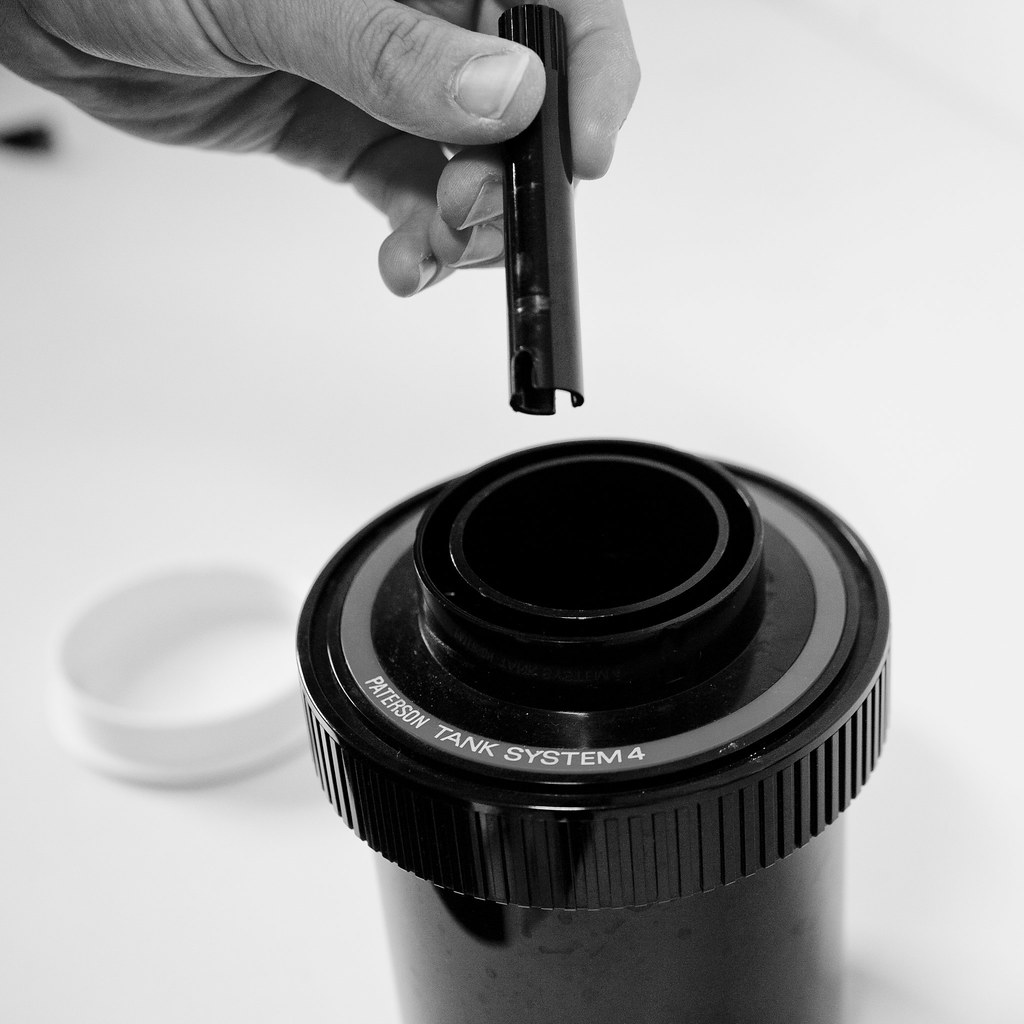
This is a personal preference of mine as I use this as a reference point when loading the film on the reel in the change bag. Before putting the reel into the change bag, put the tube through the bottom of the reel with the two ‘hooks’ facing towards you (you will load the film as if it were coming out of your body). I am left handed so I ensure the tube is on the left hand side however this may differ if you are right handed (experiment before you become set in your ways). After placing the tube through the reel I put the plastic clip on the end, holding it firmly in place. This clip is not available with all tanks/film reel combinations but I assume they are with most (since they came with the Paterson tank I use which is a prominent brand). When loading the film I use this tube and clip as a holding point and reference for making the loading action easier.
Step 2 – Cut the Leader on the Film
Cutting the film leader allows the film to load onto the reel much easier. You also have a straight edge to pull the film onto the reel with when getting started which is much easier. When loading the film keep in mind that the first couple of inches are safe to touch with your fingers. I still however just hold the straight end by the tips of my fingers to make it easy to maneuver. I generally unravel the film and cut the plastic reel off the end at this stage as well, however other people like to roll the film onto the reel and then cut it when they get to the end.
Step 3 – Feed the Film through the Hooks

My thumbs are just in front of the hooks mentioned on the film reel. You feed the film in through these hooks as they face you (whilst holding the reel). About 3 – 4cm from these hooks you can see the point where the ball bearings are located. Your main goal is to feed the film up and beyond these bearings so the film is firmly in place before you start ‘walking’ the film.
As mentioned above you are looking to feed the film in through and past these balls. Feed the film around 2 – 3 inches past the balls before you begin ‘walking’ the film.
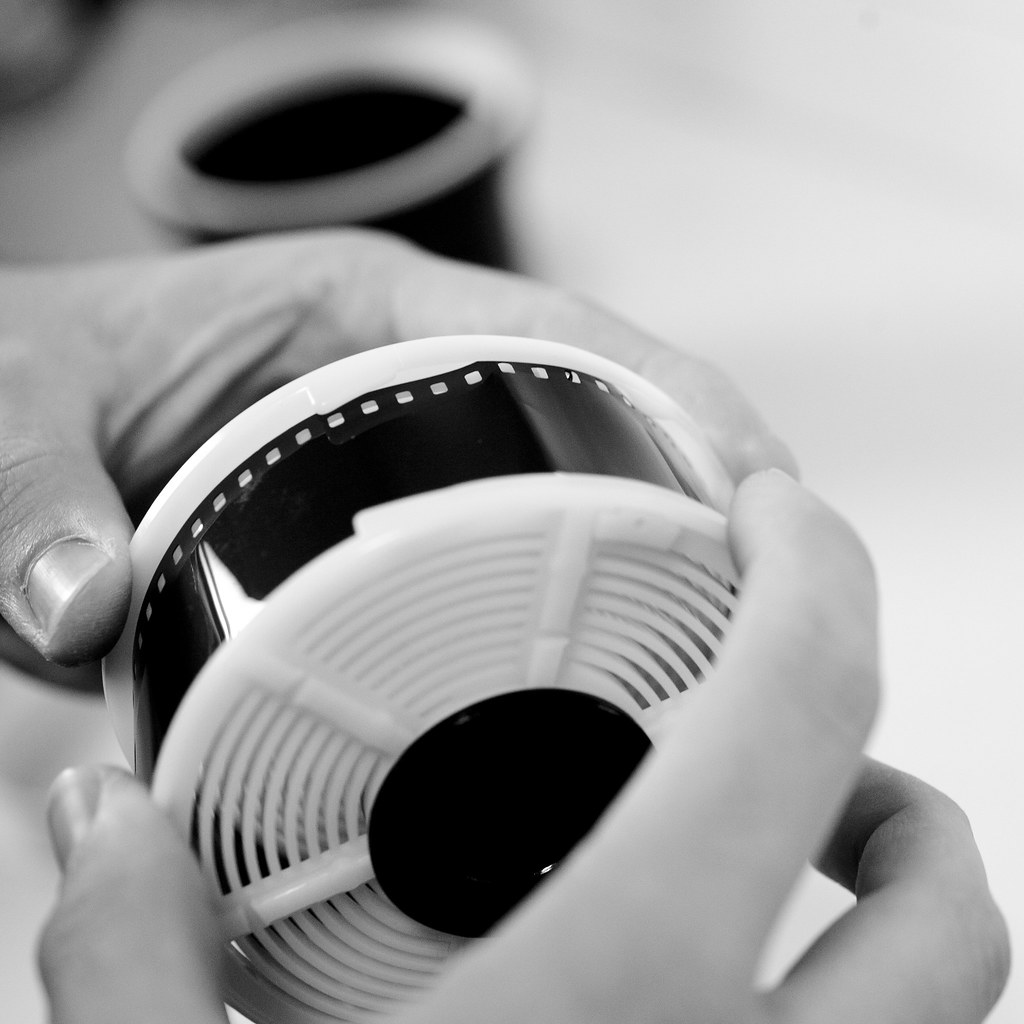
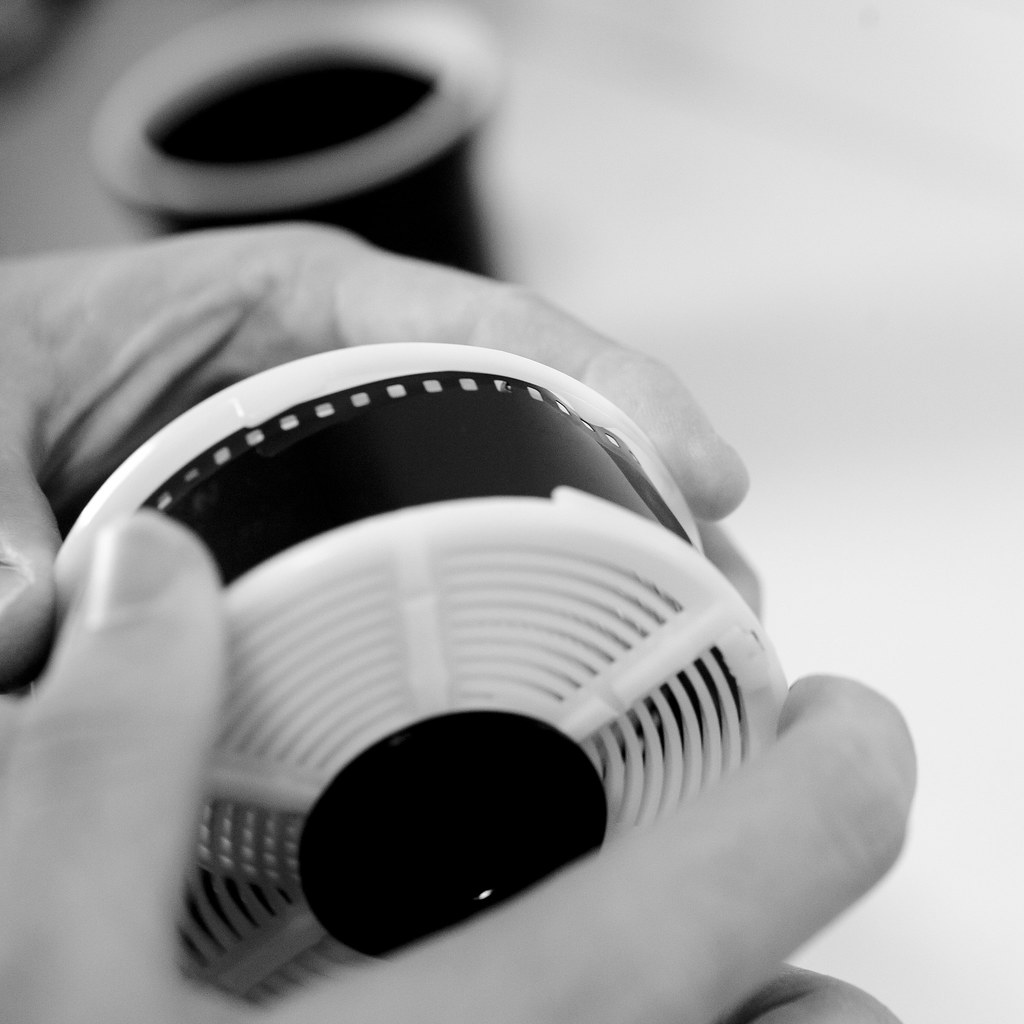
In the photos above you can see the starting point in Photo #1 and the finishing point in Photo #2 in terms of ‘walking’ the film. My right hand is the only one that moves as I rock it forwards and backwards and the film winds onto the reel. This is the term walking as I rock it forwards at a steady pace until all of the film is loaded onto the reel.
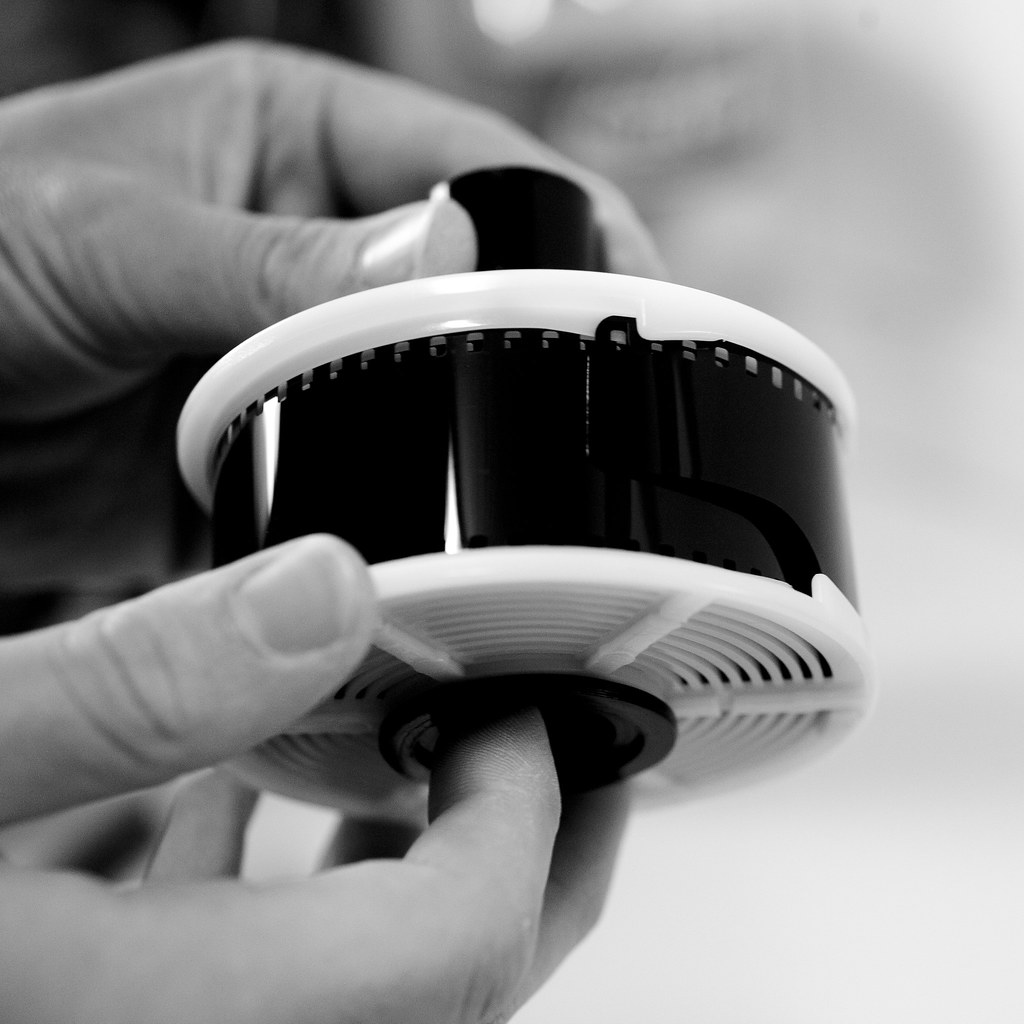
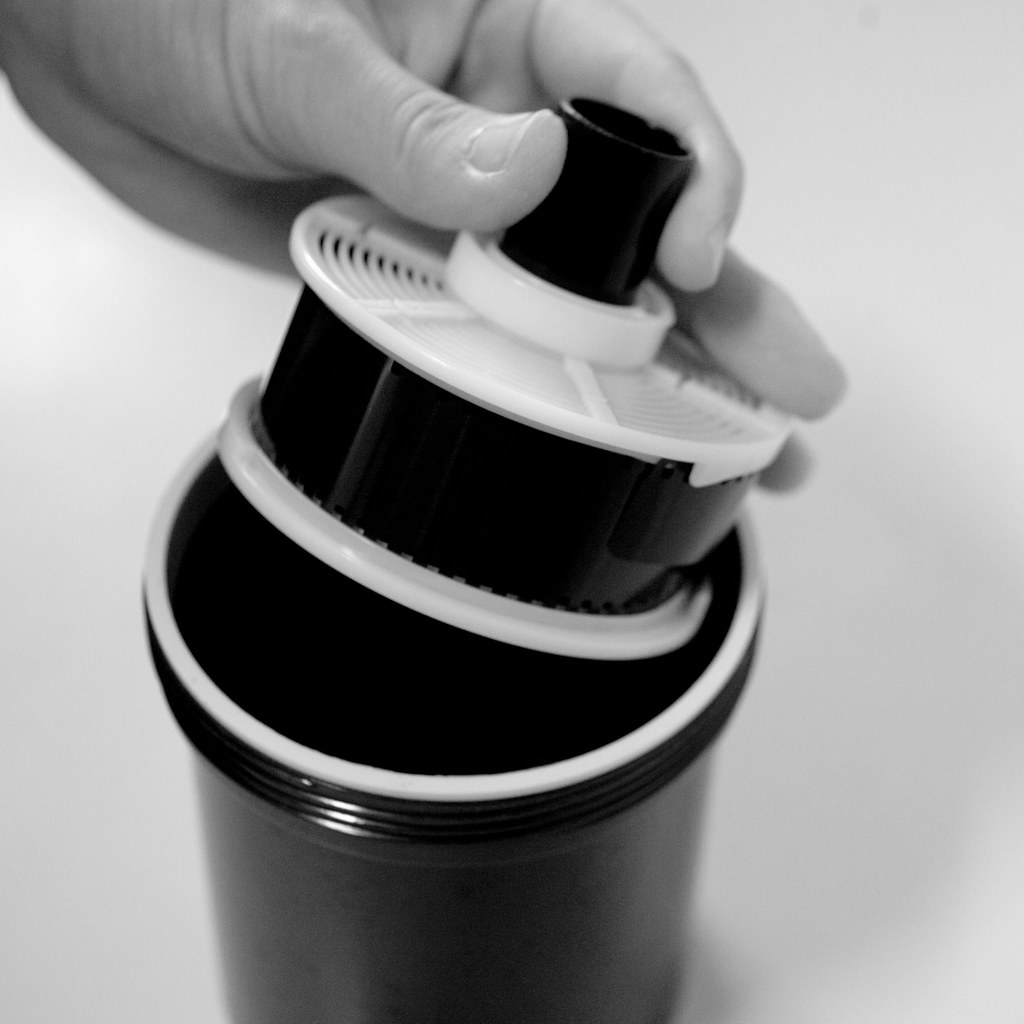
This is the finished product with the whole roll of film loaded on the reel. As with the process I had already fed through the inner tube and put the plastic clip on. If you dont do that before this stage, now is the time to do that so you can place the reel in the tank. I will discuss more about this in Part 4 but at this point you place the reel into the tank with the protruding tube sticking upwards. You then place the lid on and spin the tank lid anti-clockwise until you feel it ‘slot’ in place. I think tighten the lid up and run my finger along the bottom edge to feel that it is sitting snug (not put at a funny angle). It is important to remember that up until you have put the stop into the tank, your film is light sensitive and any exposure to light will fog and destroy your images.
Demonstration Video
Below is a great reference video that shows the process of loading the reel, but also preparing the film and putting it in the tank. Whilst I find videos are useful I found it very handy to have printed reference material when I started out (that way I can spill stuff on it, not a laptop). Otherwise I suppose I could have just recorded a video 🙂
Direct Youtube link if embed doesnt work for you.
So there we have it.. the film and you. It takes a lot of practice, I have resorted to sitting infront of the television with my test roll of film and my reel and practicing at night. Making sure that I dont get any kinks and really learn how to ‘walk’ the film on correctly. It is hard enough when you can see what you are doing so doing it within a change bag add’s a whole new level of complication.
Part 4 – The Development Process
Parts 1. 2 and 3 were all designed to get you ready for this point. Part 4.. the development process! Here I will go through a step by step look at how to develop your own film .. but I will refer to some previous steps and assume that you have completed things such as .. mixing your chemicals and preparing to do the development first. I will break the process up into different stages, the process itself doesnt take very long at all (say.. 15minutes) however having everything ready before hand will make life much easier.
Determining the Developing Time
This is written on the inside of the box the film comes in, however is a generalised time based on popular developers. A genius has come up with the idea of an online database, which does all the hard work for you. Now for the purpose of this guide I am developing a roll of Lucky SHD100 35mm film with Rodinal as a developer (Although I will include the information for Ilford ID-11 as well for continuity). Head over to The Massive Dev Chart and plot in the film type and the developer type to get all the info you need. The site will display the time and temperature your developer needs (based on the dilution you have used) and any other relevant information you need to develop the roll of film. So let’s look at what it gives us for our combination above.
Lucky SHD100 with Rodinal (1+25 dilution)
Lucky SHD100 with Ilford ID11 (stock dilution)
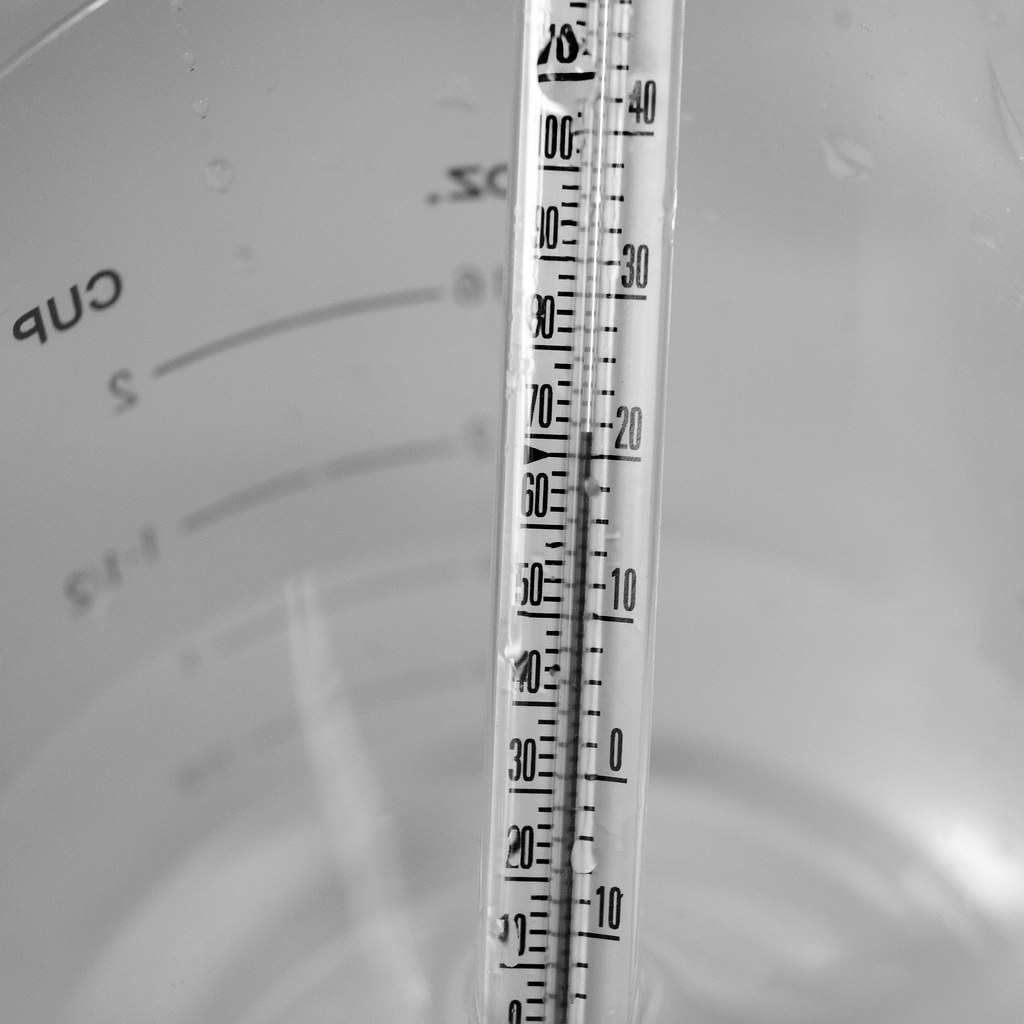
So you have similarities here, I have infact developed SHD100 with ID-11 before and I used 6mins and 30 seconds successfully. So what is development time? Development time is the amount of time the developer is to reside in the tank for. You vary this time based on the temperature of the developer (if you use a higher/lower temperature than matched) and if you want to push/pull the development of the film (will touch on this another time). Development temperature is the time based on the developer being that temp. Yes this means you have to either cool or heat your developer based on the ambient room temperature. If I need to heat the developer I will fill a bowl with hot water and float the developer in a plastic jug in the bowl until the temperature rises. If i have to cool the developer I will either do the same with icy water, or put an ice cube or two in the developer to bring the temperature down.
Getting the Tank Ready
Now is the time to put our film loading practice into action. Load up the bottom of your change bag with the developing tank (open), your film reel, your unopened film cannister, your scissors and your bottle opener. Get in a comfortable position with the bag having enough room to dangle beneath you (I usually sit on the edge of a couch). Make sure you have everything you need in the bag and then zip up the bottom, insert your arms into the top of the bag and begin.
- Using the bottle opener open the film cannister and retrieve the film.
- Cut off the film leader and grab the square edge you have just created on the film.
- Pickup your film reel as you have practiced and find the hooks (ensuring they are facing you).
- Feed the film in through the hooks, up past the balls and onto the reel.
- Walk your film on until you get to the end of the roll.
- Cut off the end of the roll and walk the rest of the film on (making sure there is nothing protruding from the edge).
- Once you have all of the film on the reel, if you havent fed through the plastic tube ensure you do so now and attach the plastic clip to hold the reel in place.
- Place the reel into the tank with the long end of the tube extending upwards and the film reel sitting at the bottom of the tank.
- Place the lid on the tank and rotate anti clockwise until it slots into the groove.
- Screw the lid clockwise into the lid locks tight. Ensure this has screwed on straight, to prevent any light leaks.
- Run your finger along the bottom edge of the lid to make sure it is sitting on correctly.
- Remove your arms and open up the bottom of the tank, you have now loaded your film successfully.
Getting the Chemicals Ready
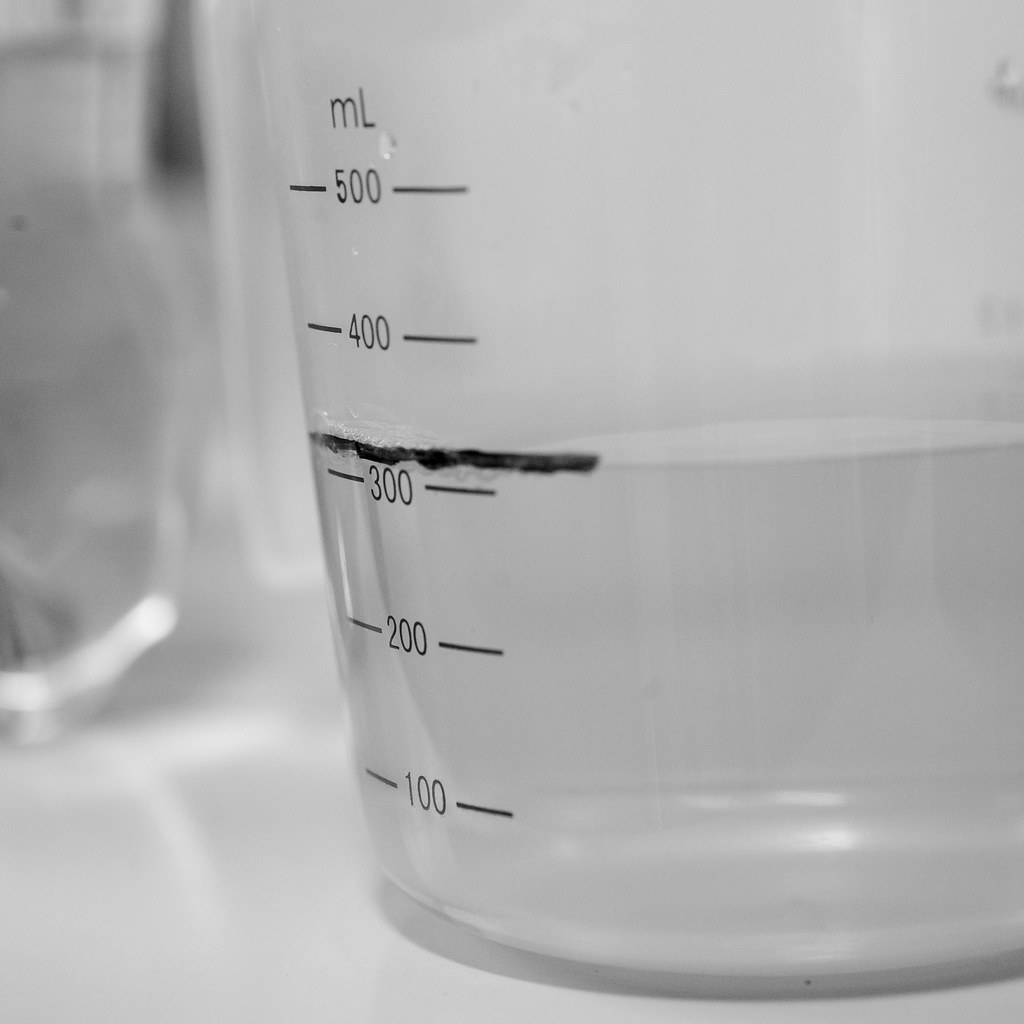
I find it good practice to have everything on hand, so generally have 3 different sized jugs with the chemical level marked for the amount of developer, stop and fixer I need. I also have a separate bowl set to the side as I almost always have to either heat or cool the developer to get it to the correct temperature to develop. I use a small measuring flask to get the finer measurements, otherwise I use a detailed measuring cup to do the large amounts of liquid (300ml in the measuring cup and then 30ml in the measuring flask). If you have not yet mixed your chemicals yet, refer back to Part 2 of this guide for instructions, or follow the instructions on the inside labels of the chemical bottles/boxes you have purchased.
Measure out 310ml (or 330ml if you want to ensure all of the reel is covered in the tank) of your developer, fixer and stop (in 3 separate containers).

Develop your Film
Yahoo the fun part! The most important part of this process is the amount of time the developer is in the tank. If you have the developer not in long enough, the negatives will be under exposed.. and if you have the developer in too long they will become overexposed…Simple as that.
- Get your stop watch/timer and set the time to your development time. In this case it is 6min and 30 seconds. Set this down next to the development tank.
- With your developer measured to the right amount and in a bowl put in a thermometer to get the current temp.
- Either float the developer in it’s container in a bowl of hot water/icy water to bring the temperature to 20°c (in my case it was icy water).

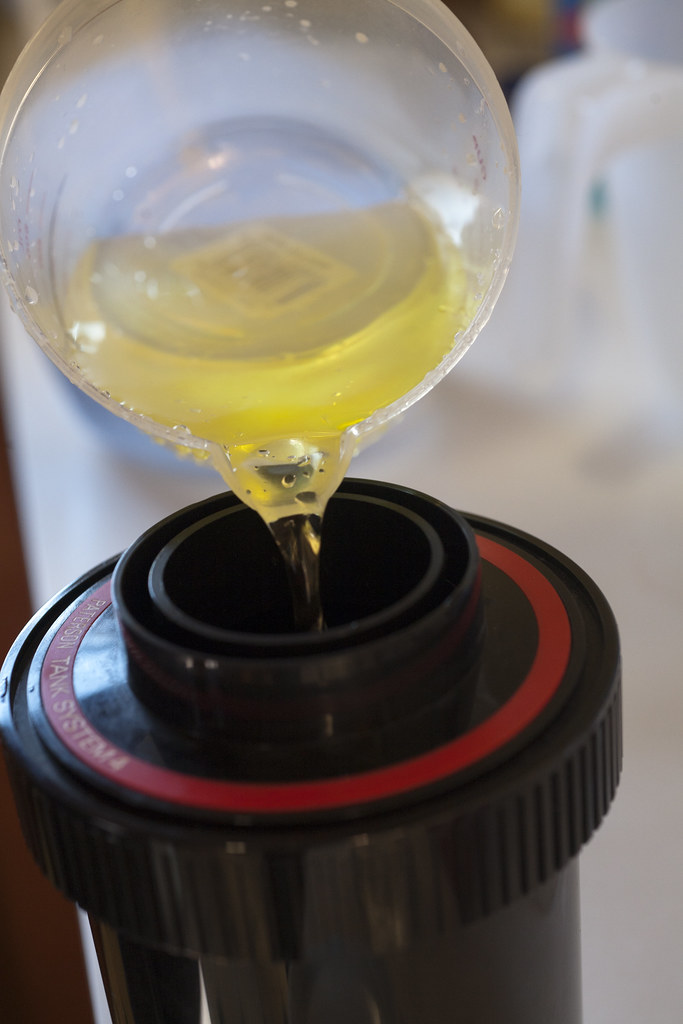
- Keep an eye on the temperature and remove the plastic white cap on the tank (do not unscrew the tank lid!). Get your swizzle stick ready as you will need this for agitation.
- Once your developer hits that magical 20°c mark start pouring it into your tank and hit your timer at the same time.

- Once all of the developer is in the tank (and I mean all, not 90%.. not 95% but all) insert your black swizzle stick to begin agitating the developer. I agitate non stop for the first minute, spinning the reel 5 turns each way and then in random directions. This is to ensure that developer full coats all of the film in the tank. I think agitate for 30 secs of every minute up until 5mins and then non stop for the final 90 seconds. If you want to be extra zealous just agitate for the full development time. This is a very important step and whilst some people put the top cap on the tank and turn it upside down, I mainly use the swizzle stick to really make sure the film is sloshing around/spun around in there. If you do not do this stage correctly it may effect your whole roll of film. With some areas coming out patchy or undeveloped.

- Once your counter gets low.. get ready to pour your developer out (into a container is fine). Grab your STOP and get ready to pour it in.

- Once your timer goes off, empty out the developer into a container and pour the STOP in straight away. The STOP will stop the developer.. from developing 🙂 So agitate it non stop for around 1 – 2 minutes. Spin it around lots and from side to side (dont tip the actual tank upside down tho!)

- At this time I usually set my timer to 3 minutes and then discard the STOP. **Shock horror yes the ILFOSTOP is yellow!**
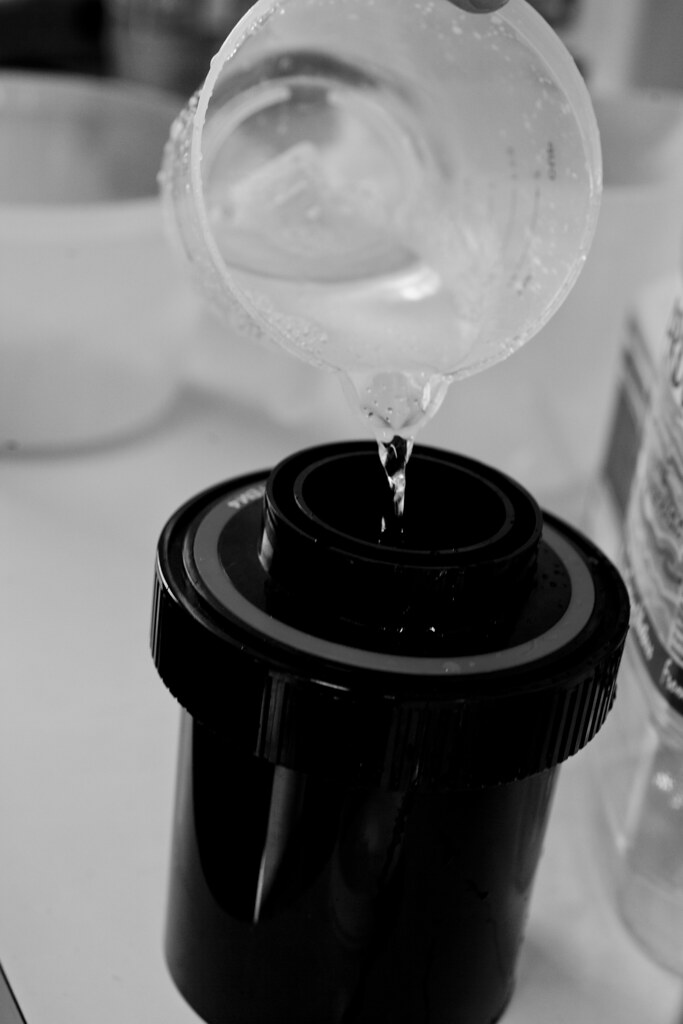
- Pour in the Fixer and agitate for 30 seconds each minute until you reach 3 minutes.

- After 3 minutes, pour the Fixer into a container (because you can reuse). I havent reused much yet, but from what I have read you can keep using it (and testing it strength) but at least just add 1 minute per use to the amount of time it spends in the tank.
- Get the Kodak Photoflo ready at this point (or another negative cleaner if you have one) and pour it into the tank. I dont have a rule I just agitate it for a couple of minutes before pouring it out.

- Discard the Photoflo and get ready to unveil your hard work! Carefully take the lid off the tank and you will see the reel sitting in the bottom of the tank.

- Carefully remove the reel from the tank and you will see the developed negative still in place on the reel.

- I generally pinch the edges ever so slightly to easily pull the film off the reel. It is no longer sensitive so feel free to look at the images.


- Grab your peg and find a nice spot to peg it up, preferably in a non dusty area. I generally peg mine up in the bathroom off the shower rail until the majority of the drying is done. I think pop it in a wardrobe that is tall enough/large enough it wont be damaged until it is properly dry. You can actually see for this roll I didnt cut off the film leader at the start.. it was a pain to roll the film on because of that mistake!

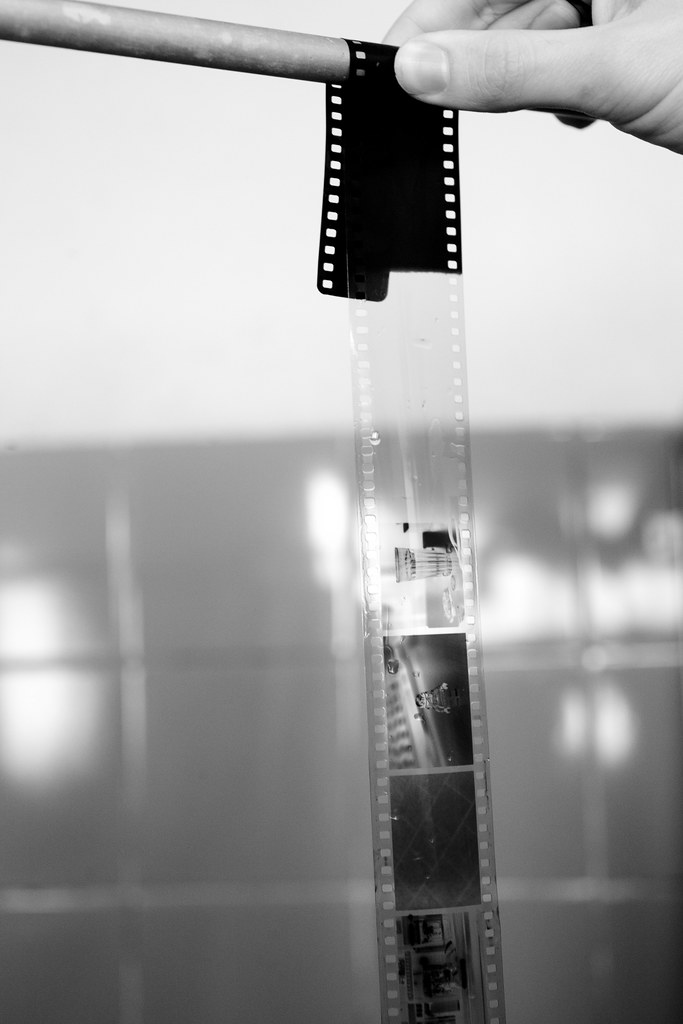
- Let your negative dry for a few hours before attempting to cut and scan. This will help prevent scratching and any such problems.


Sit Back and Relax
Annnnnnnnnd there we have it.. all that time and preparation for a relatively quick and easy process! I was very happy once I finished my first roll.. the unveiling of the negative when you pull it out of the tank was such a great feeling. Once you have done it a couple of times it becomes like riding a bike.. and then you start thinking about doing C41 and Slide development.. but that will have to wait for another time and place.
Part 5 – How to Digitise your Negatives

Finally.. almost there.. in fact I would say it is already a success as you dont have to scan your own negatives if you dont want too. So far we have covered what you need to get started, what you need to prepare to develop and then developing the film itself. This extra part is basically to cover how to get your negatives archived and on your own computer at a decent price. If you are going to do a high res print and you arent satisfied with the scanning results, I would suggest getting a print shop or a photo shop doing a high res scan for you.. it is very cheap and a great way for you to get the size/resolution you need to print.
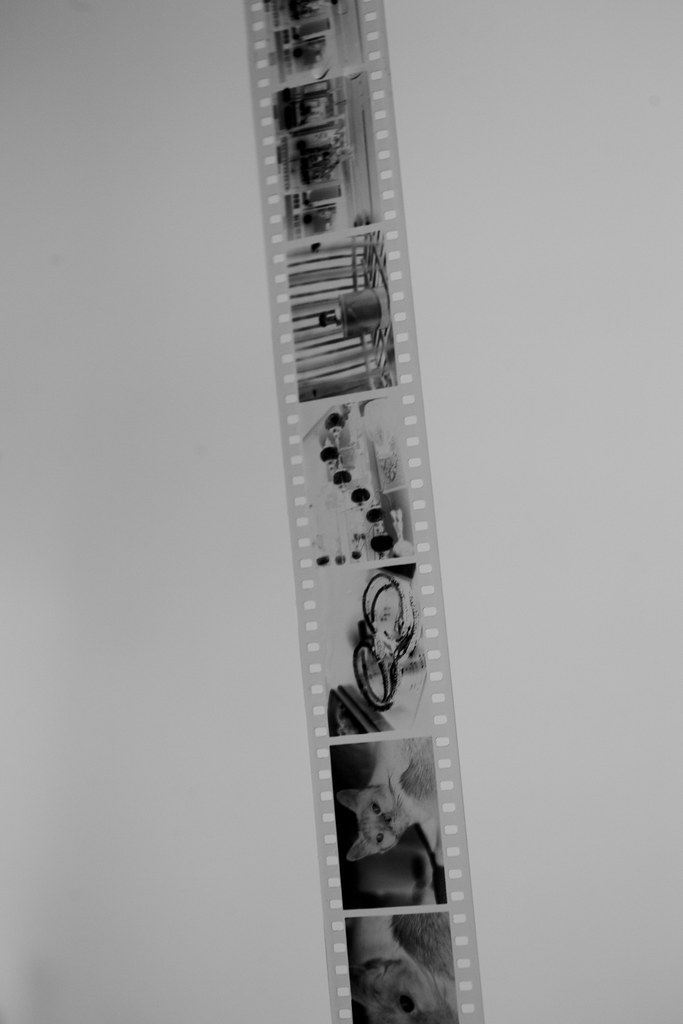
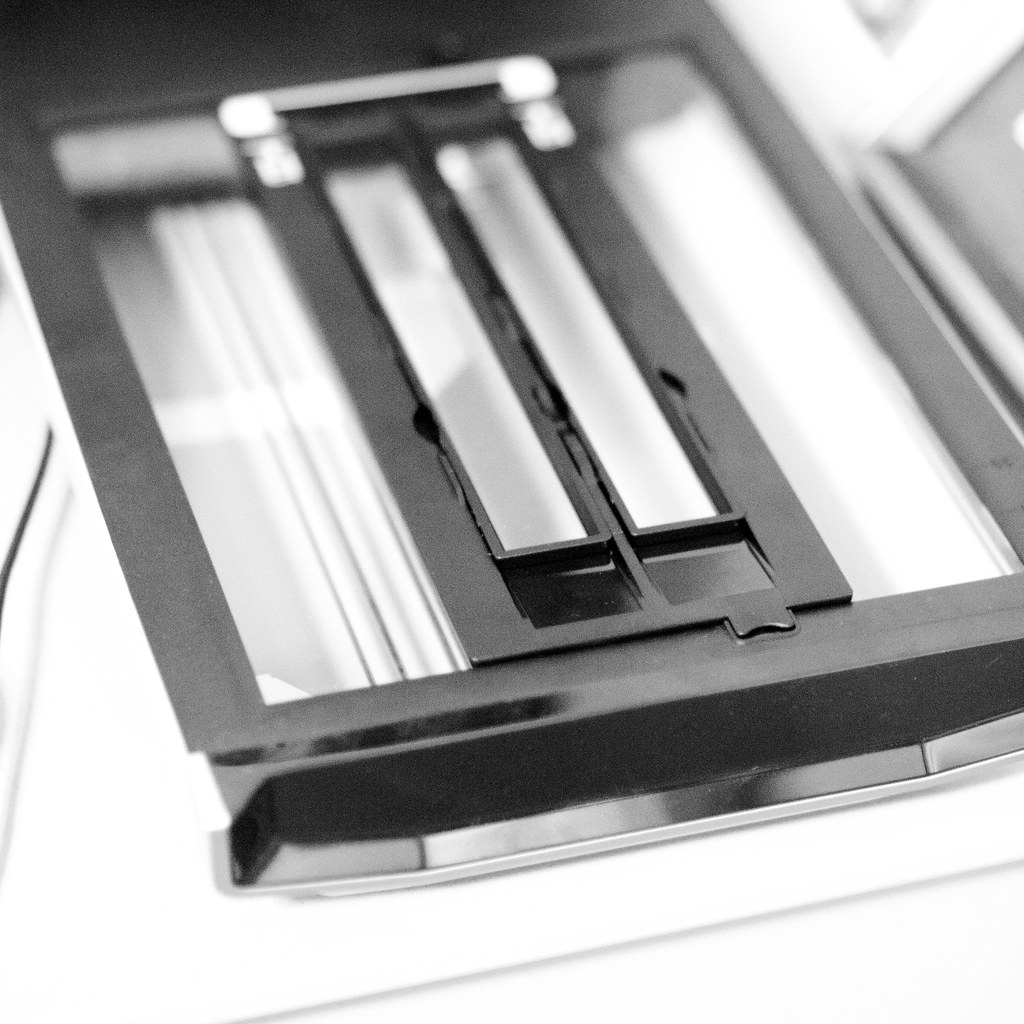
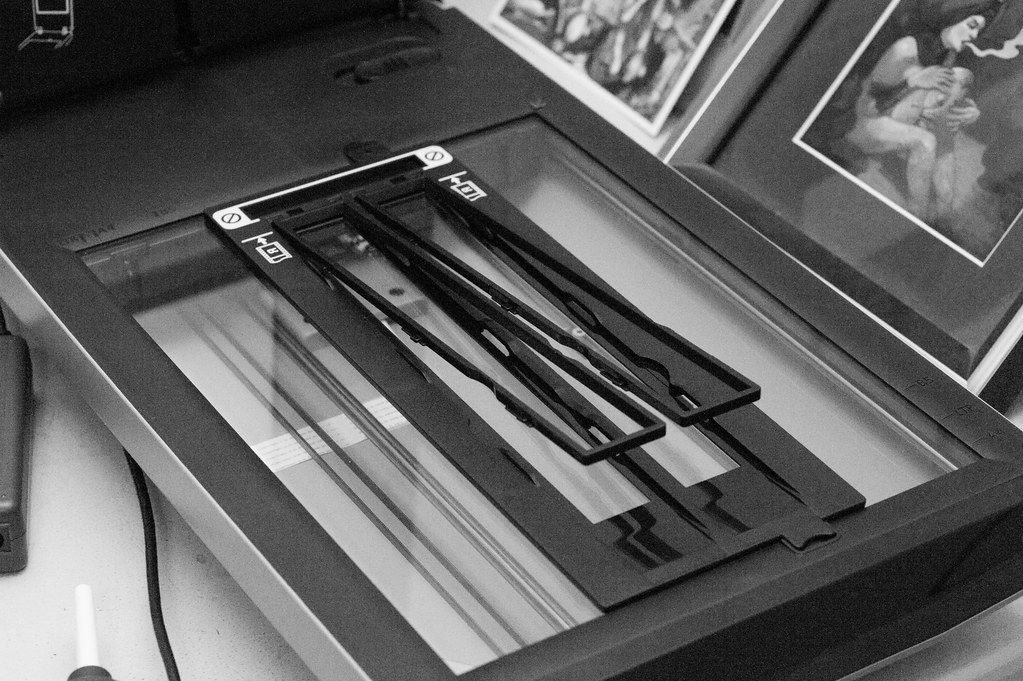
This wont take very long and I have taken quite a few shots for this part of the guide. I should say straight up that you must wait for your negatives to be completely dry before you start the scanning process. It is easy to jump the gun just to see your photos but you will regret this later! Negative storage methods vary or you might want to store your negatives differently but ill just explain how I have mine. I have a 3 ring binder that I keep plastic negative sheets in to store my negatives (you can use any old binder, but I bought the sheets from Vanbar). They are stored in rows of 6, and I have the pages labelled with the camera used, the film type and the date processed. This I found was the easiest way for me to keep track of what I have .. so far. Obviously as my film collection grows I will have to change this and most likely store negatives by film type, camera type or year. You have a few options in terms of scanning.. you can go to a high end solution straight up.. which is a dedicated film scanner with a variety of products on the market by brands such as Plustek, Prime and Inca. You then have the flatbed solution which has offerings by Epson and Canon which have film negative holders which you insert into the flatbed scanner.

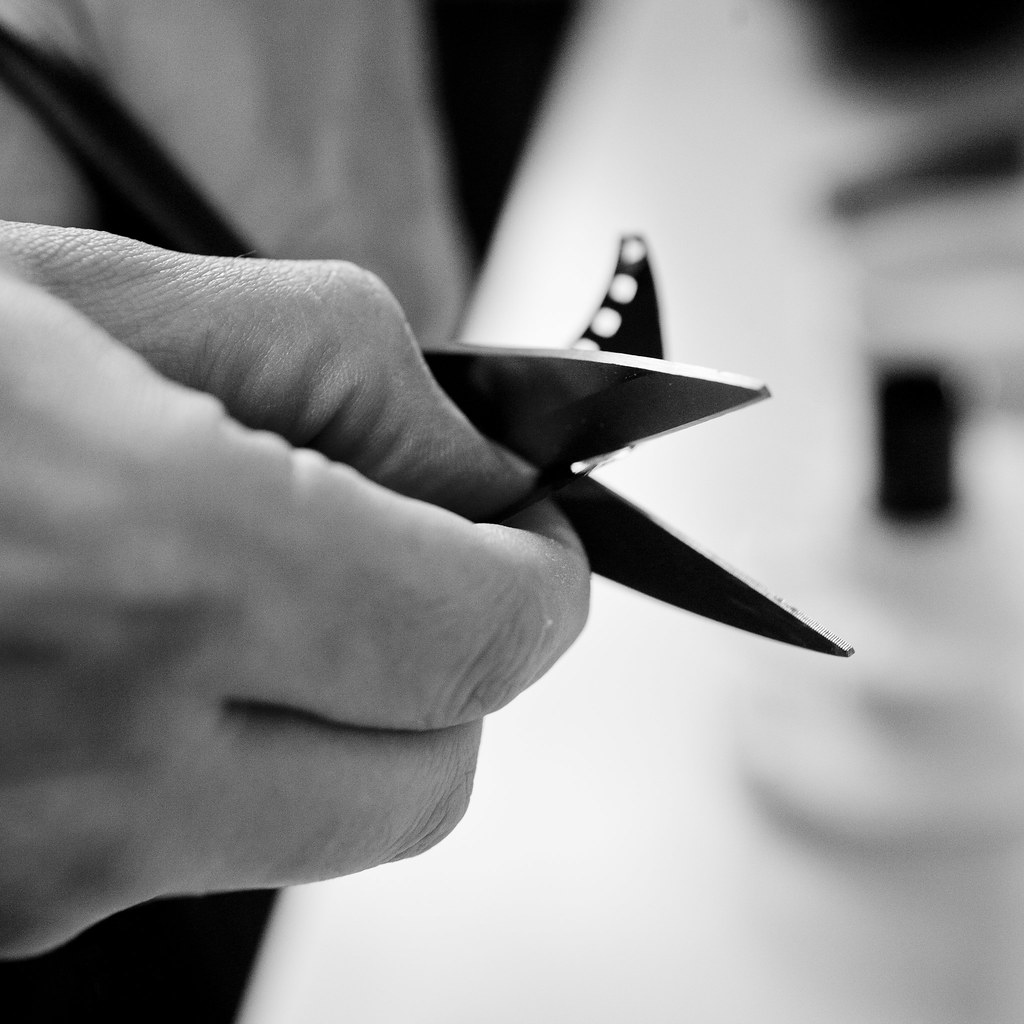
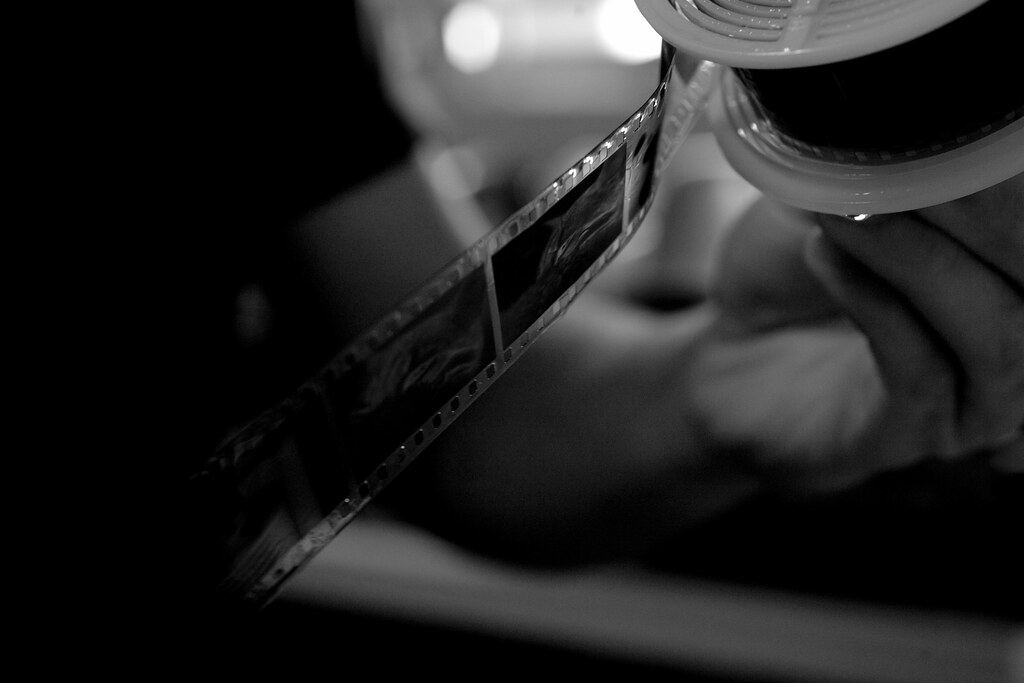
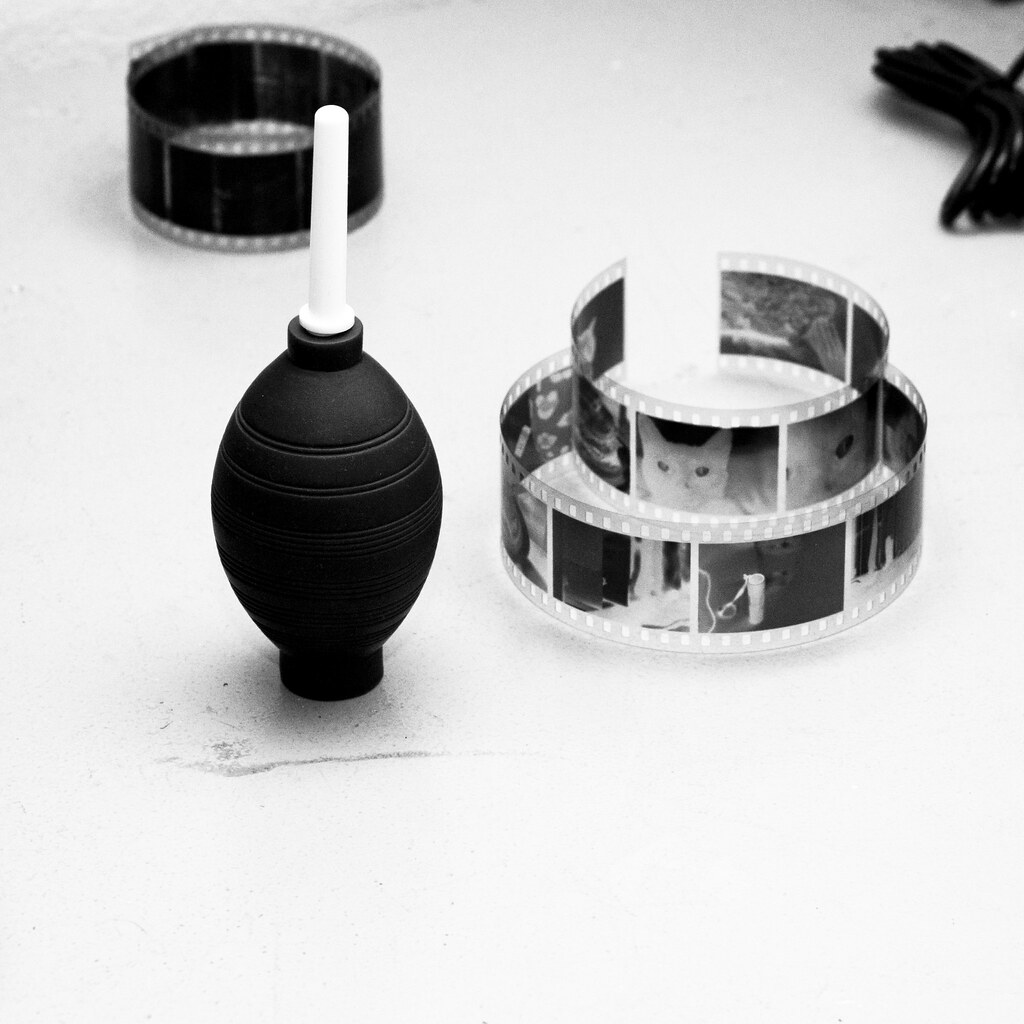
I use a Canon 8800F flat bed scanner (as above)which is capable of scanning both 35mm negatives and 120 film. Another handy item to have next to your scanner for the process is a Rocket Blower (see below) to blow dust out of the scanner and off the negatives as it will show up when scanning. As you can see with the shot below, I have already cut the negatives I developed in Part 4. I simply start from the beginning of the roll and cut the negative after every 6 photos. Make sure you use a small pair of scissors with a flat cutting blade so you can precisely cut between the negatives as you only have 1 – 2mm to work with.
The process is very easy. Once you have cut your negatives you open the flatbed and insert the negative holder you need (in this case 35mm). You then pinch the sides of the two plastic holders to release the top section which holds the negative down onto the holder.
There are guides that show you which way to insert the negatives but you can always rotate/flip the scans afterwards if they go in the wrong way. The easiest way I remember is that the glossy side of the negative faces down and the negative will always try to curl upwards (towards you). Once you slide them into the clips at the end, slowly lower the top part of the holder into they clip in place and hold the negative firmly.

And then.. you are done. Close the lid, launch the scanning software you decide to use (I simply use Canoscan Tool) and scan away! Once you are done you can then import into your favourite management software and touch up, watermark or fix any blemishes you might want to fix. I generally do everything in Lightroom and export for uploading onto Flickr or onto my website/blog.
So I suppose this is where you want to see shots that I developed making this guide? Well ok.. just a few. I was actually testing a roll of the Lucky SHD100 in my newly acquired Nikon F3 with Nikon 55mm Micro 2.8 Ai lens. It is a great camera and the lens is amazing with a very short minimum focus distance. The depth of field is so so so very shallow though which makes it super difficult with film! I think ill need some practice with it on my D90/D700 before I tackle more rolls with it. You will see some scratches and some dust and marks on the scans.. I may clean and rescan but then the camera is a little dirty too… I think it is all part of the charm (and I certainly am no expert yet!).


And there we have it. My first guide for this blog.. and my first photography guide in general. I hope you have liked it. I will put up a summary post I think in a few days with any extra tips I think that can help with the process. I would love some feedback and if you have anything you would like to add, or you would like to contribute to my tips post then please feel free to leave a comment or email me at info@outsideinpixels.com
I appreciate you following the blog and I hope the guide is very helpful to you. Film is a wonderful part of photography and I hope to inspire some other photographers to give it a try i the future. With the enthusiasm I see being shown towards film by new and existing photographers, I am a firm believer that indeed Film is not dead!
Black & White file development guide by Jack Chauvel | RAW
[…] Read The Guide to B&W Film Development TweetRelated Posts:Shooting concerts and at venuesElinchrom 60/40 Split and what does it meanMy thoughts on Wedding PhotographyInterview with Russ RobinsonFAQ with Tristan Jud Tagged With: black and white, film, guest post, tips About TristanI'm a Husband, Commercial, Fashion, Glamour & Lifestyle Photographer. I work with my Wife to produce high quality images. Tristan Jud Photography · Facebook · Twitter · flickr · 500px · Google+ […]
Black & White film development guide by Jack Chauvel | RAW
[…] Read The Guide to B&W Film Development TweetRelated Posts:Shooting concerts and at venuesElinchrom 60/40 Split and what does it meanMy thoughts on Wedding PhotographyInterview with Russ RobinsonFAQ with Tristan Jud Tagged With: black and white, film, guest post, tips About TristanI'm a Husband, Commercial, Fashion, Glamour & Lifestyle Photographer. I work with my Wife to produce high quality images. Tristan Jud Photography · Facebook · Twitter · flickr · 500px · Google+ […]
Steve
Excellent guide mate, I’m slowly reading through it while jumping back and forth to Vanbar, seeing what they have in stock and such.
Thanks for putting this together, very helpful.